Use manual uploads for selective setup
Manual uploads are the right fit when:
- the source game is not in The Game Crafter
- you only want a subset of assets
- you are iterating on a few components without reimporting everything
You upload from inside a game, on its Custom Pieces tab.
Choose what you are building
The upload panel is organized by the kind of piece you want to create, so you only see the fields that matter for it:
- Tile Stack -- the main flow for cards and tiles, single or in a deck
- Dice -- custom dice built from face images
- Image Token -- a flat token from a single image
- Model Token -- a 3D token from a model file
- Book -- a multi-page reference or rulebook
Build a tile stack from images
Tile Stack is the workhorse for cards and tiles:
- Start with Back Images if your cards share a back. One back can be reused across many cards.
- Add your Face Images. Each image becomes a card in a grid of previews.
- For each card, set:
- Name -- defaults to the file name, editable to whatever reads clearly at the table
- Qty -- how many copies of that card to create
- Back -- which back to pair with it, or no back at all
Each card shows a checkmark once its image finishes uploading, and a progress bar reads "Uploading tile X of Y..." so you can watch the batch complete.
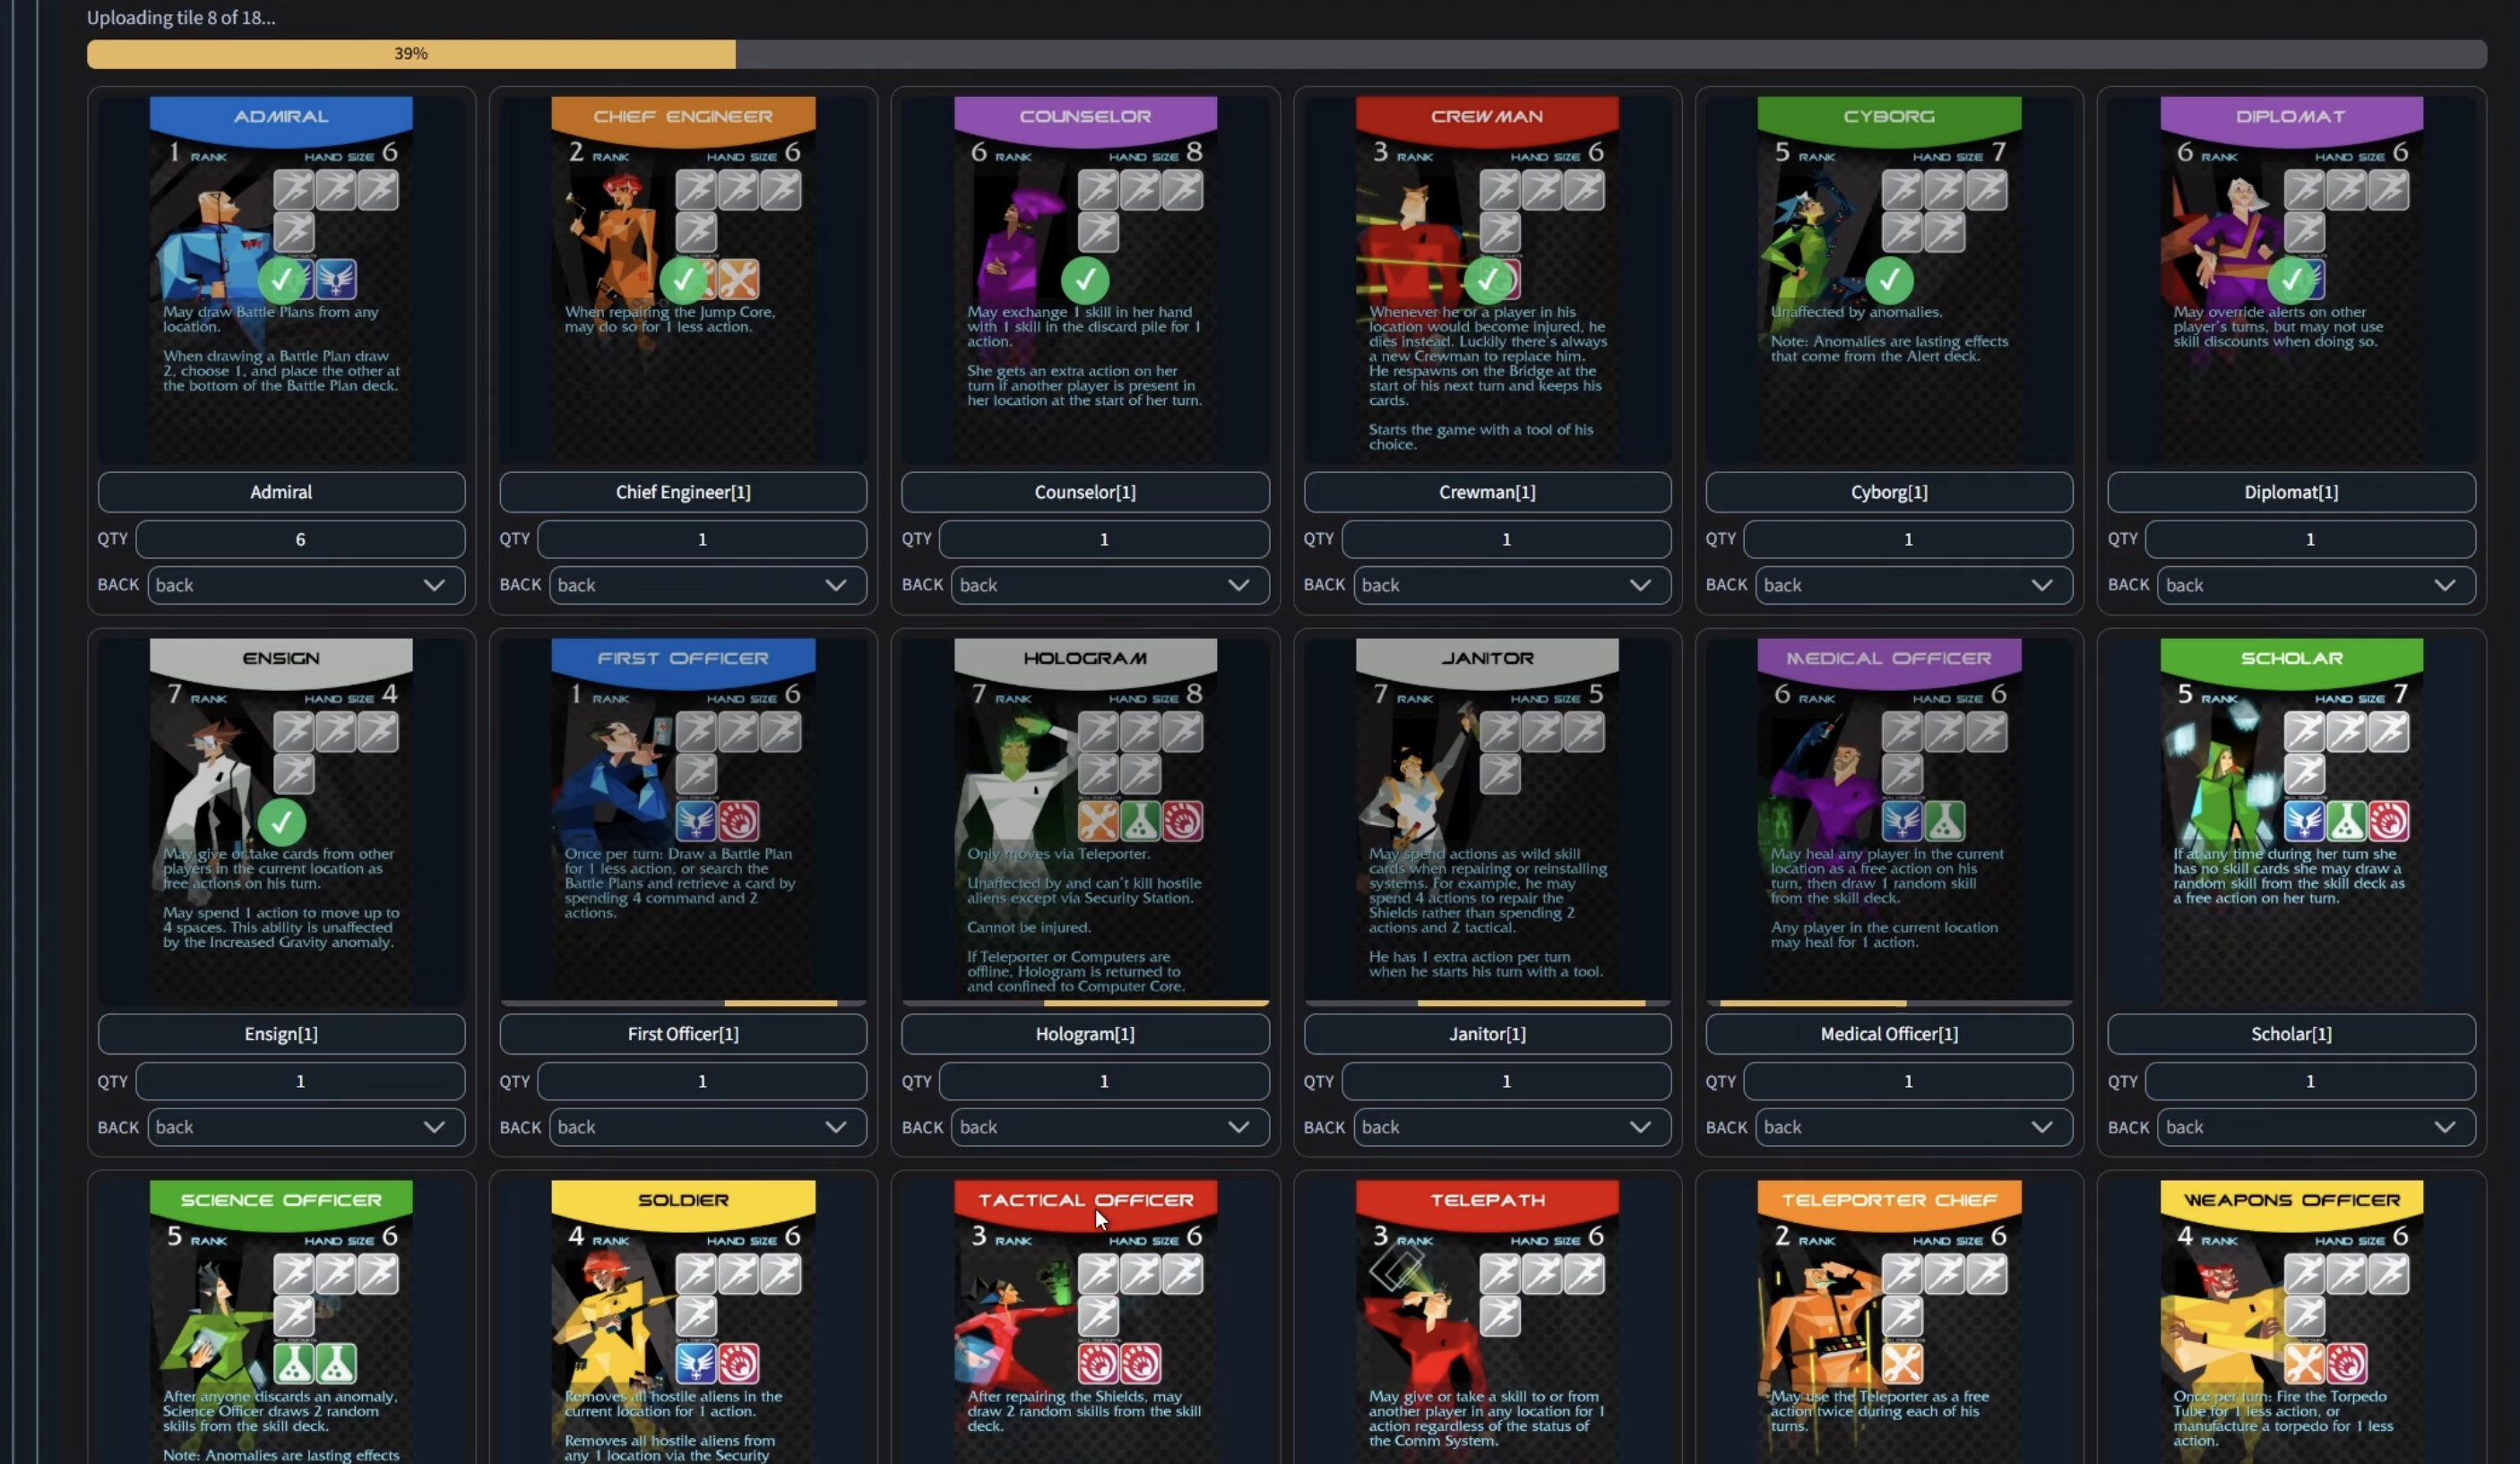
If your files follow a naming convention, the panel can also read the name, side, and quantity straight from the file names, which is handy for large sets.
Upload in small batches
Smaller uploads are easier to verify. Bring in the pieces needed for the current workflow, confirm they look correct, then continue. Anything you have already uploaded stays listed on the tab, where you can review or remove individual pieces.
Normalize before playtesting
After upload, make sure the pieces are named clearly and placed into a usable table layout. Upload alone is not the goal; a table that supports the session is.