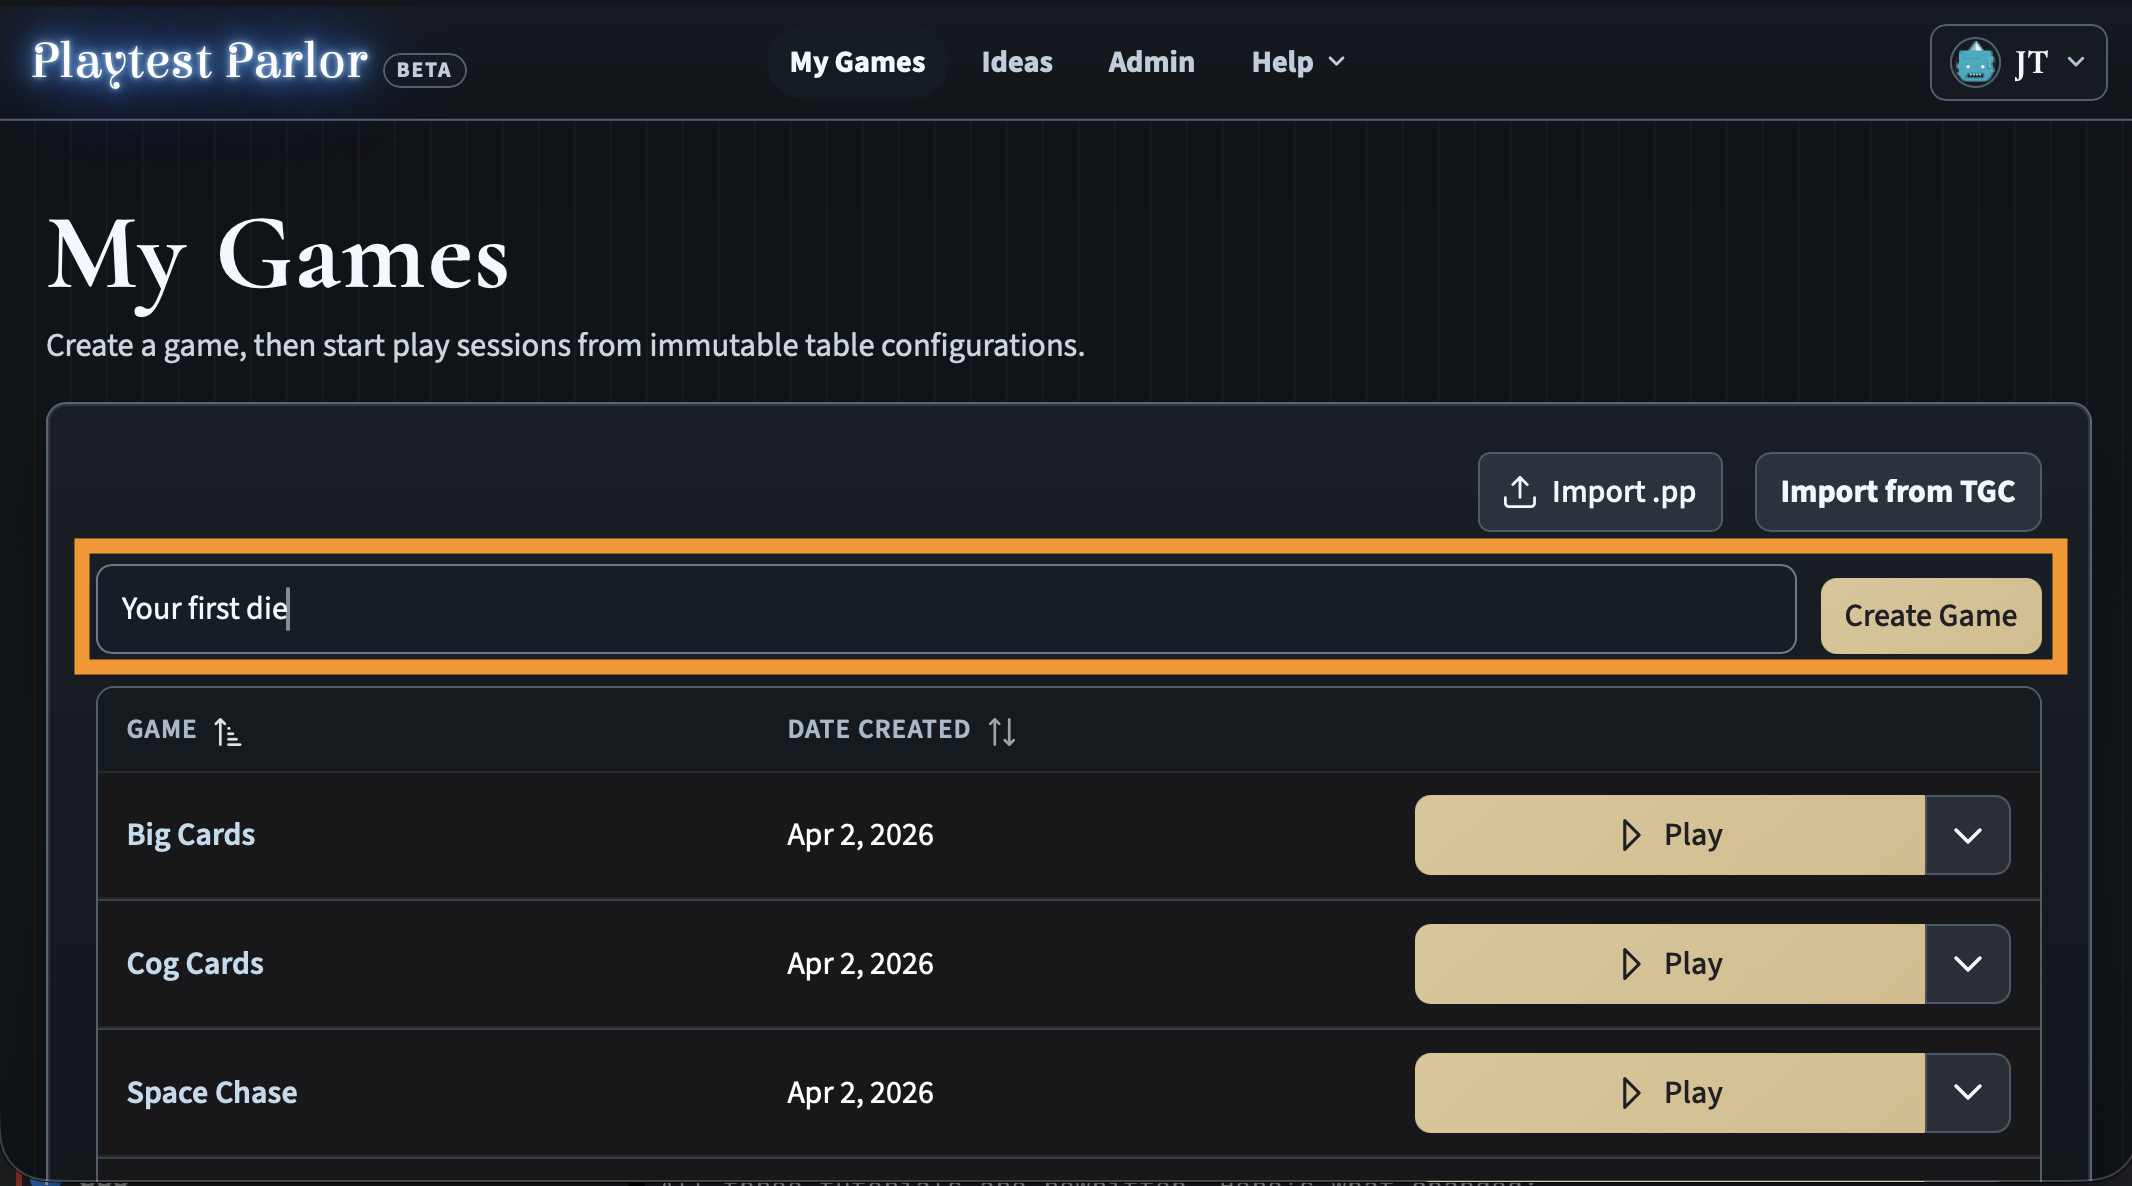
Create a new game
From the My Games page, type a name for your game and click Create Game.
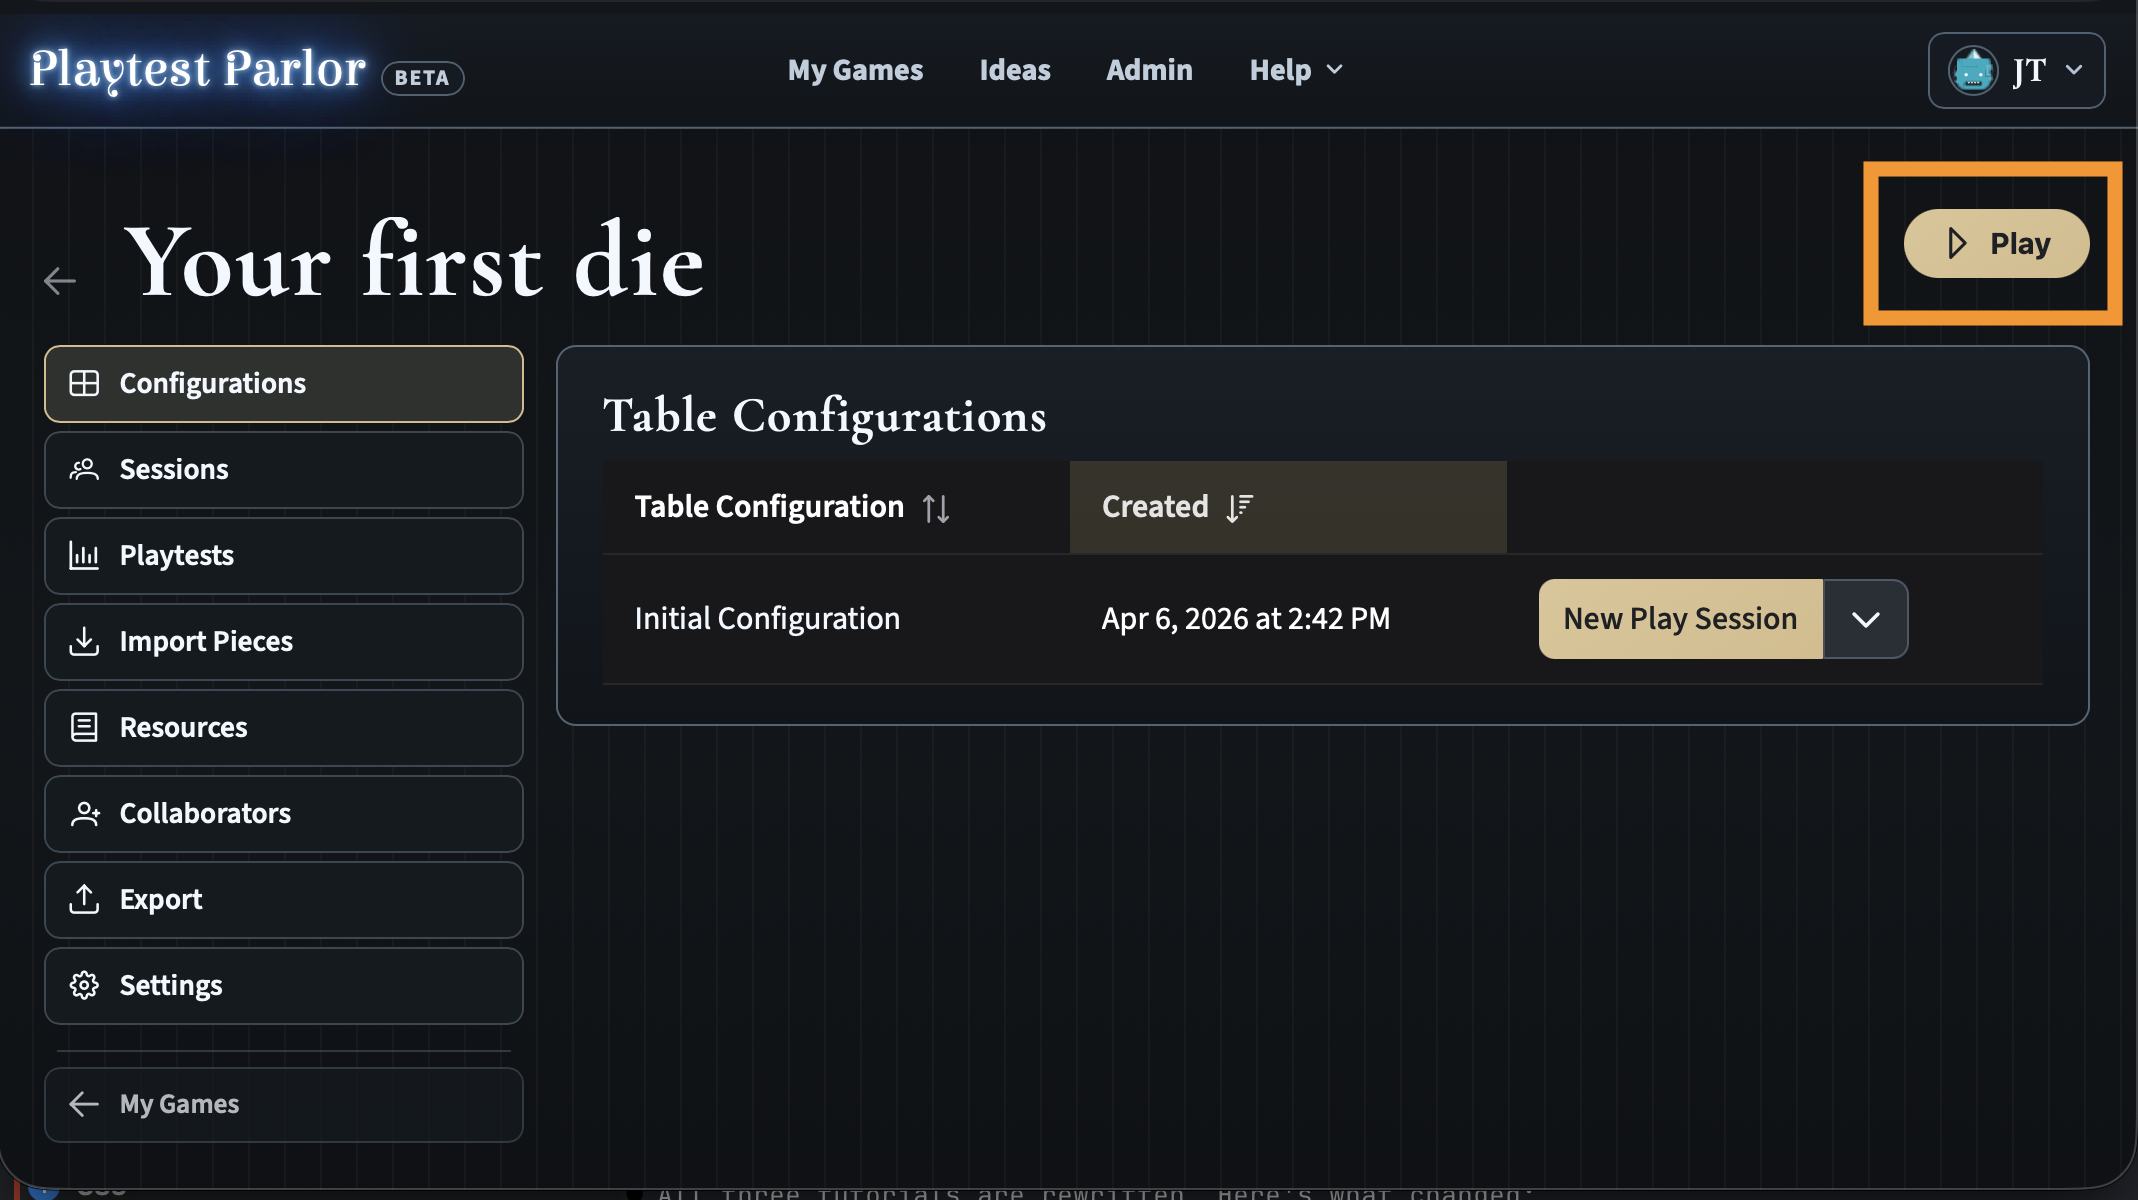
Start a play session
Your new game starts with one table configuration called Initial Configuration. Click Play in the top-right corner or click New Play Session next to the configuration to open it.
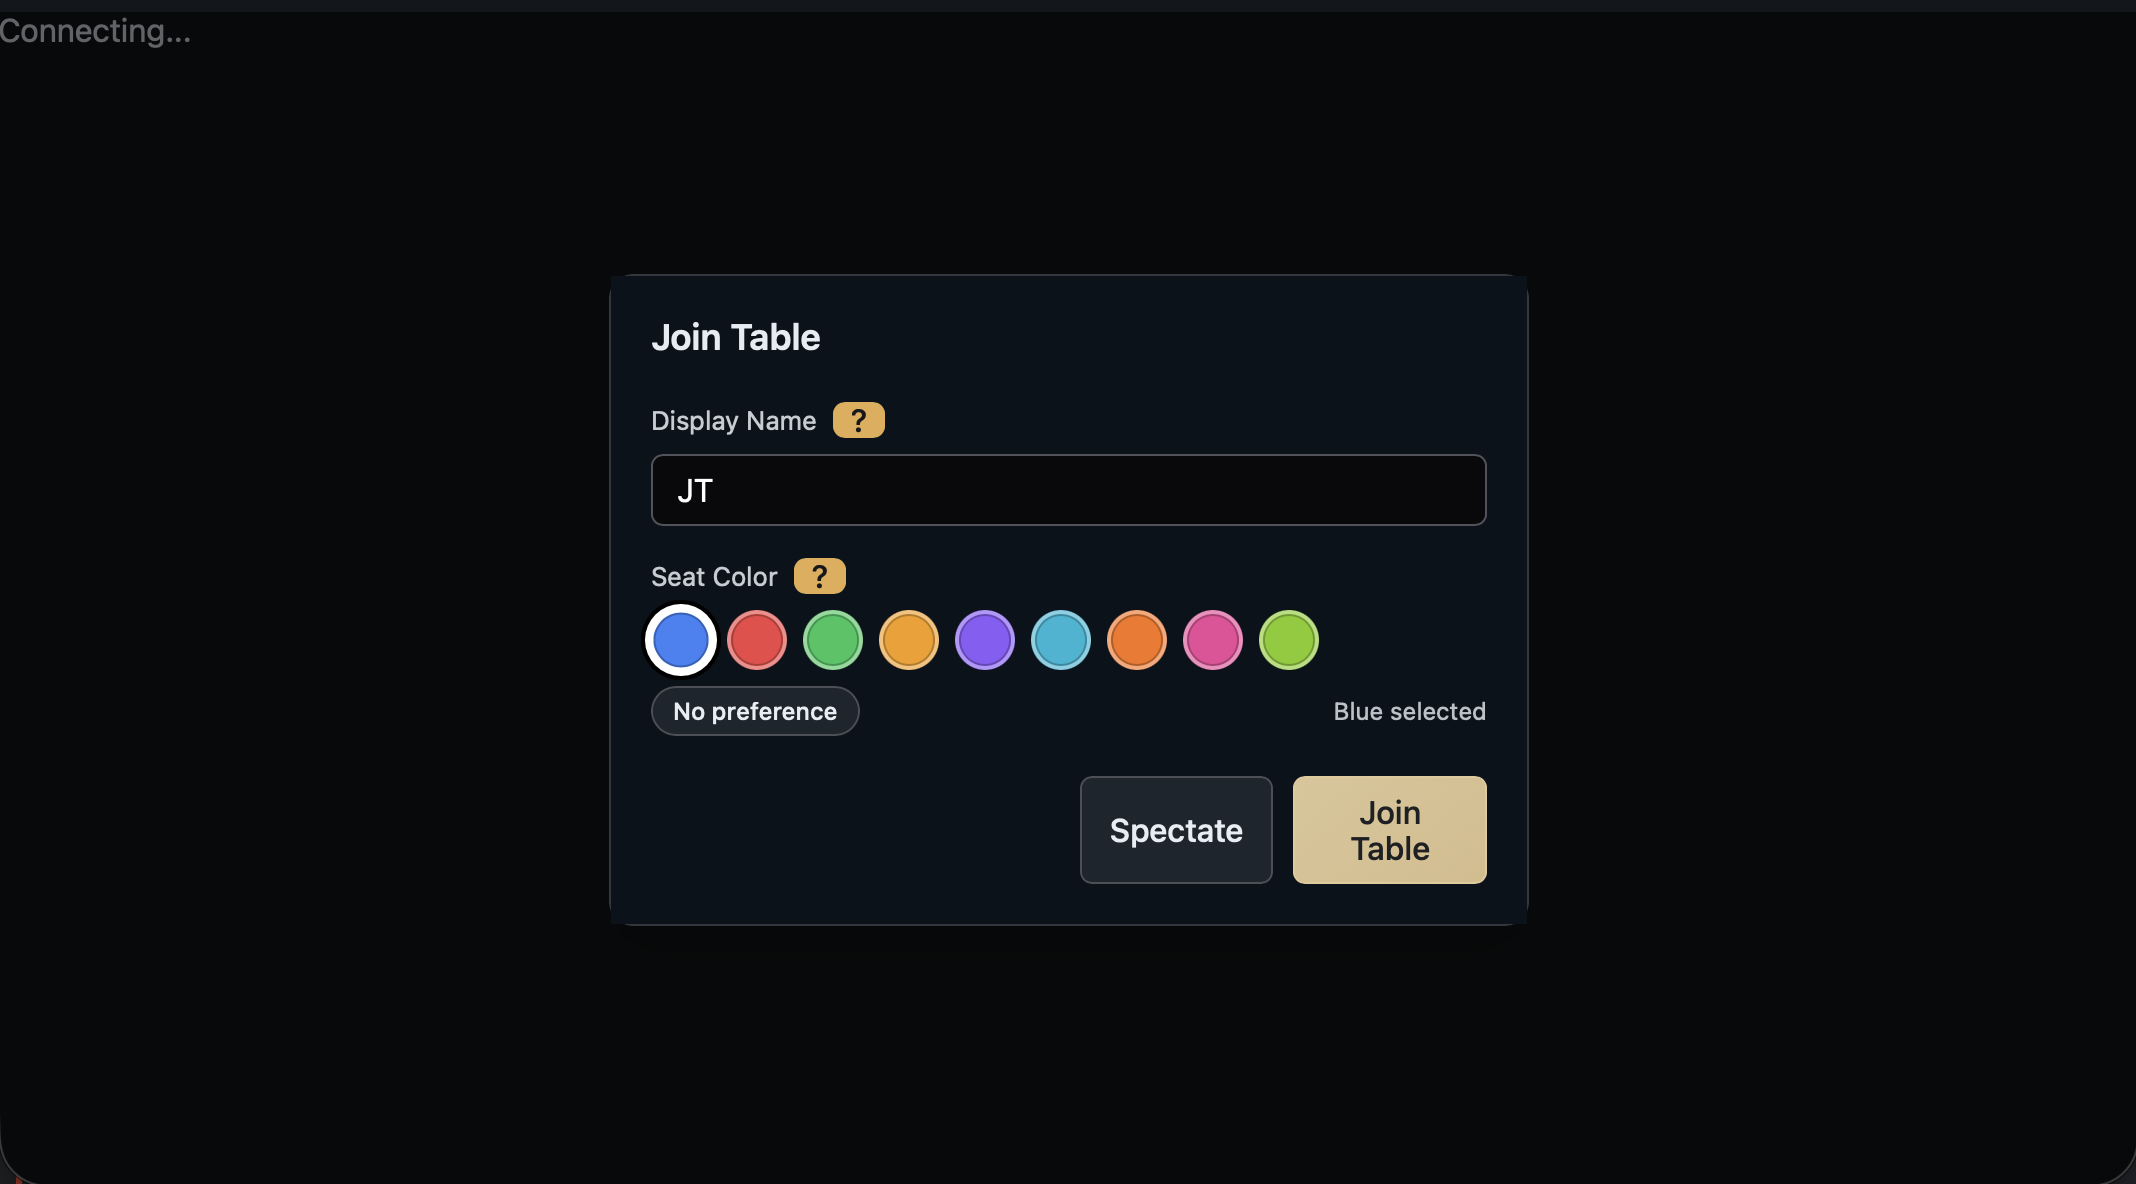
Join the table
A Join Table dialog appears. Choose a display name and pick a seat color, then click Join Table.
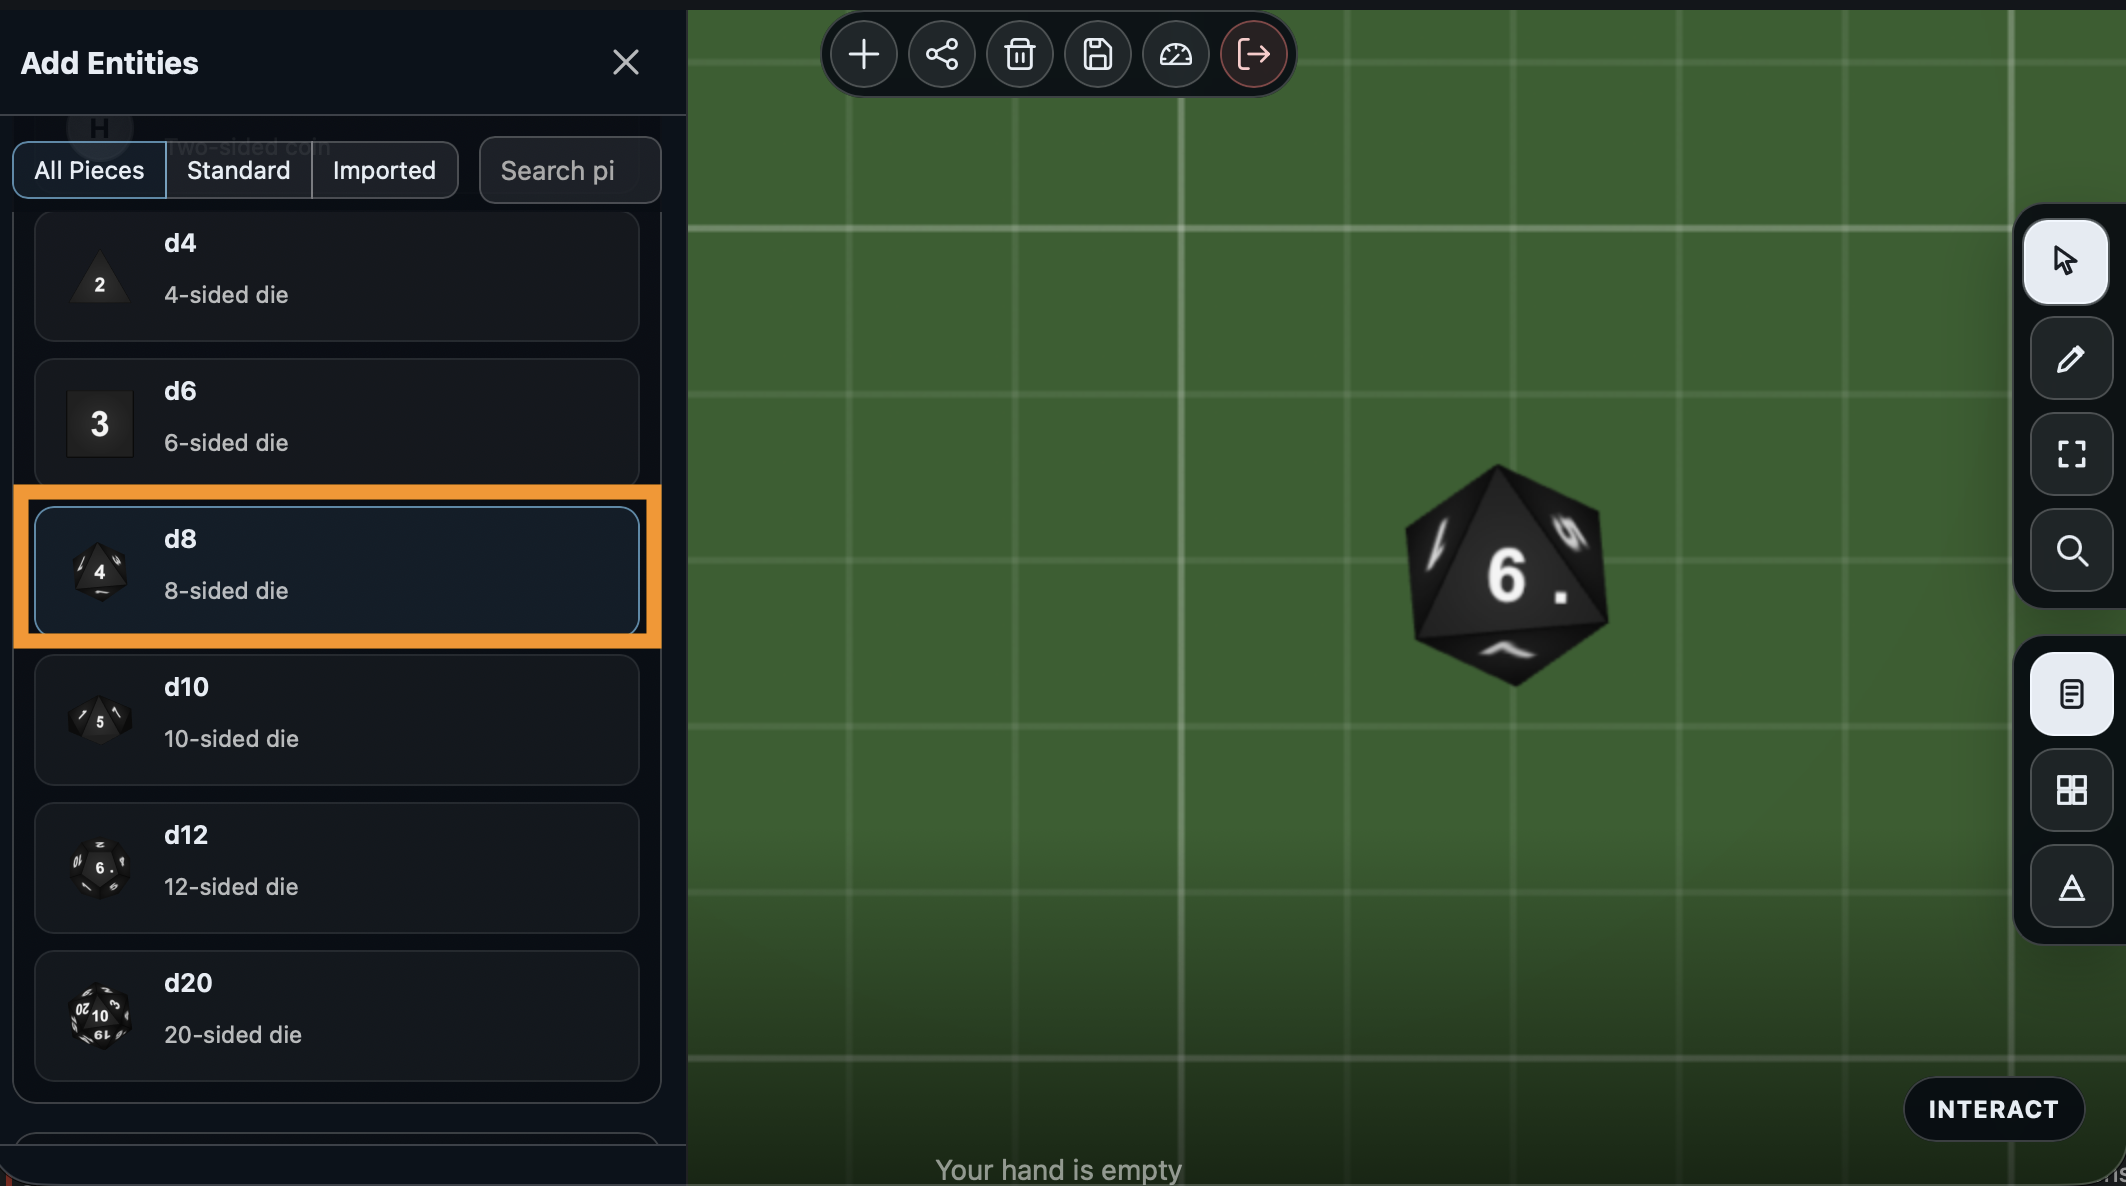
Add a die
Click the + button in the toolbar at the top of the table. The Add Entities panel opens on the left. Scroll down to find the dice section - you will see options for d4, d6, d8, d10, d12, and d20.
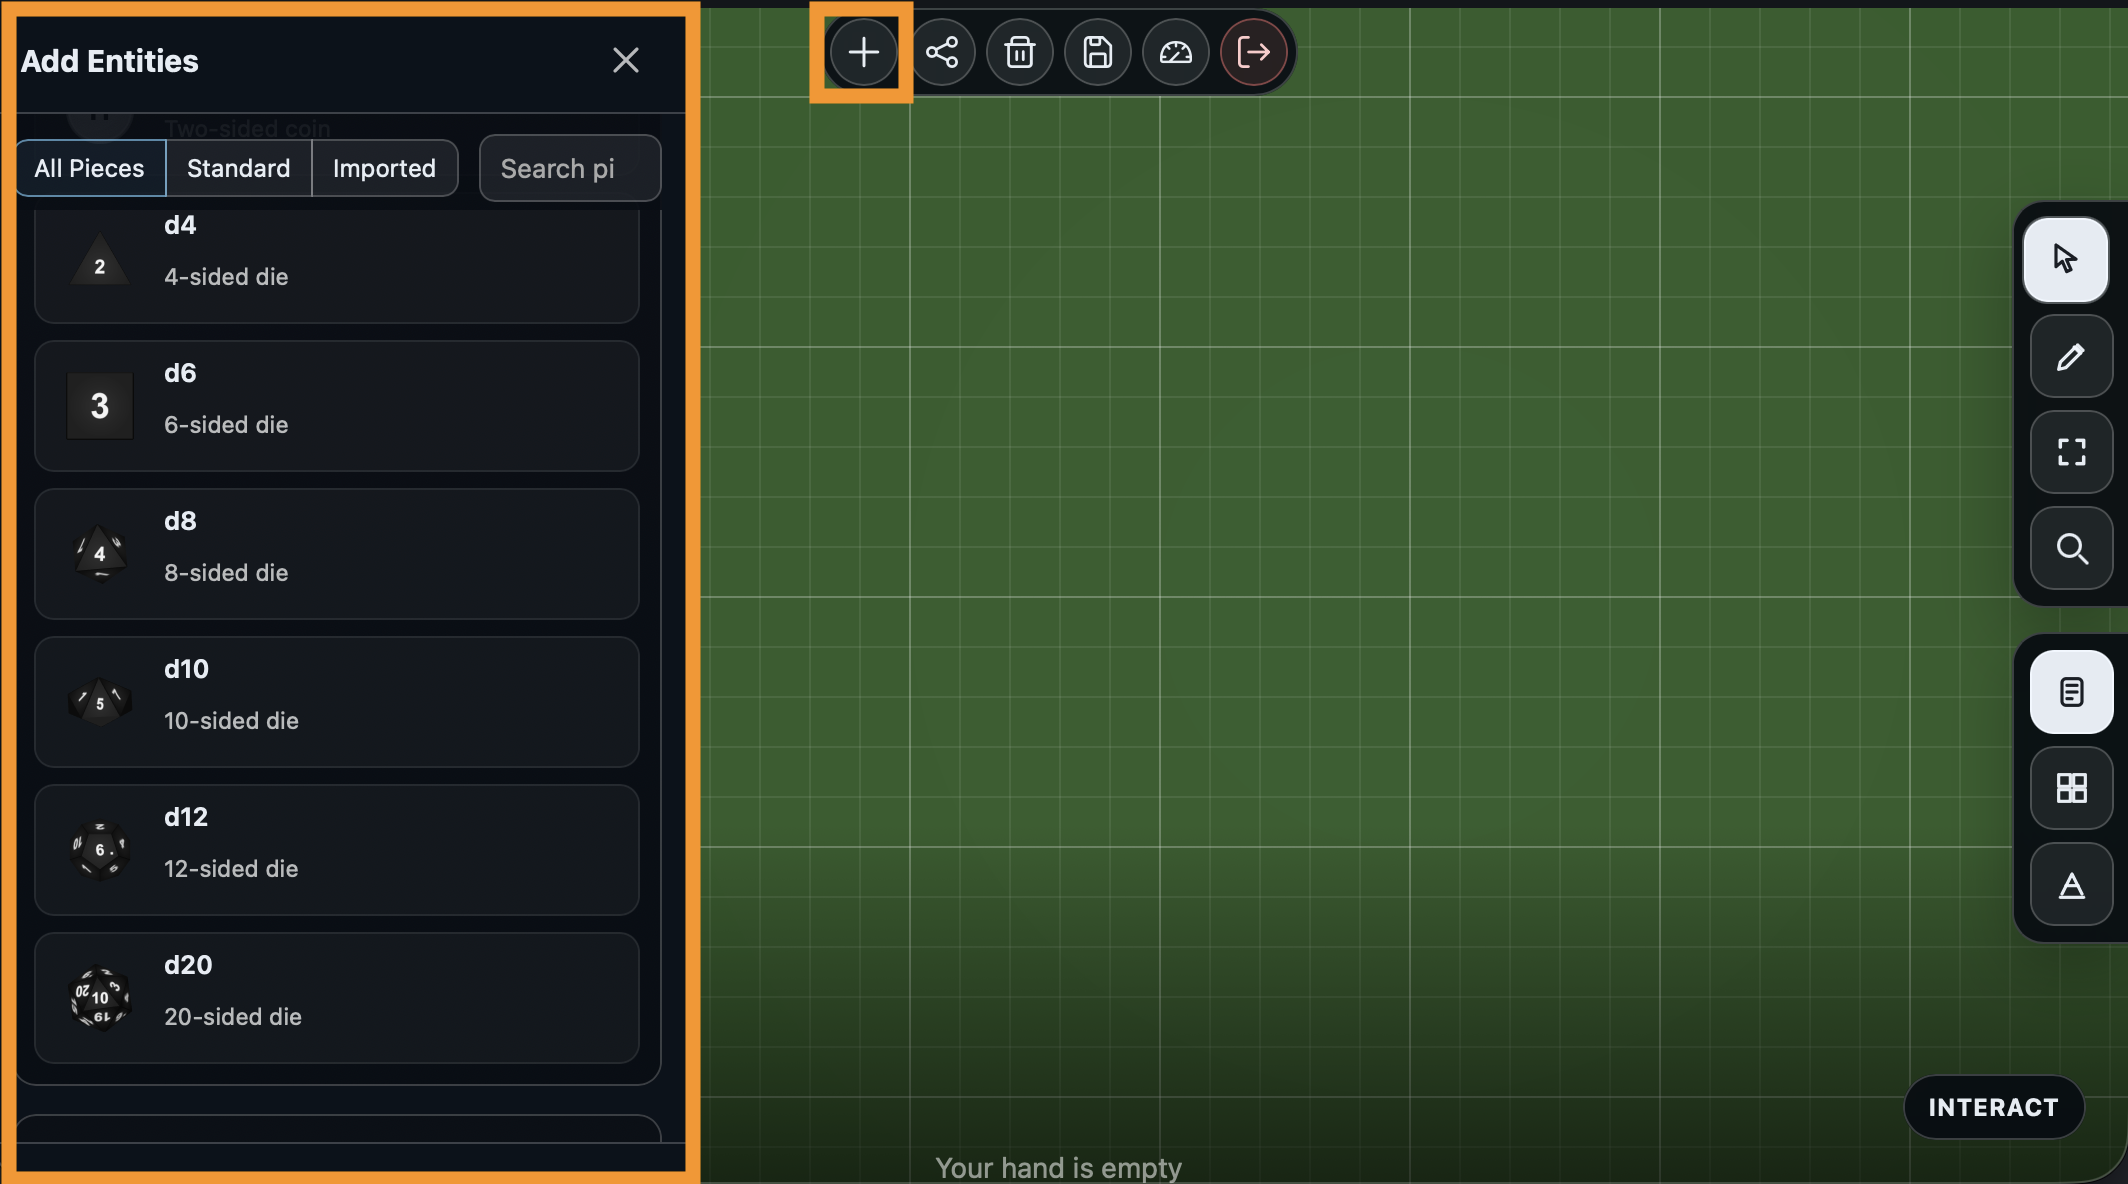
Click d8 to add an 8-sided die to the table. It appears immediately.
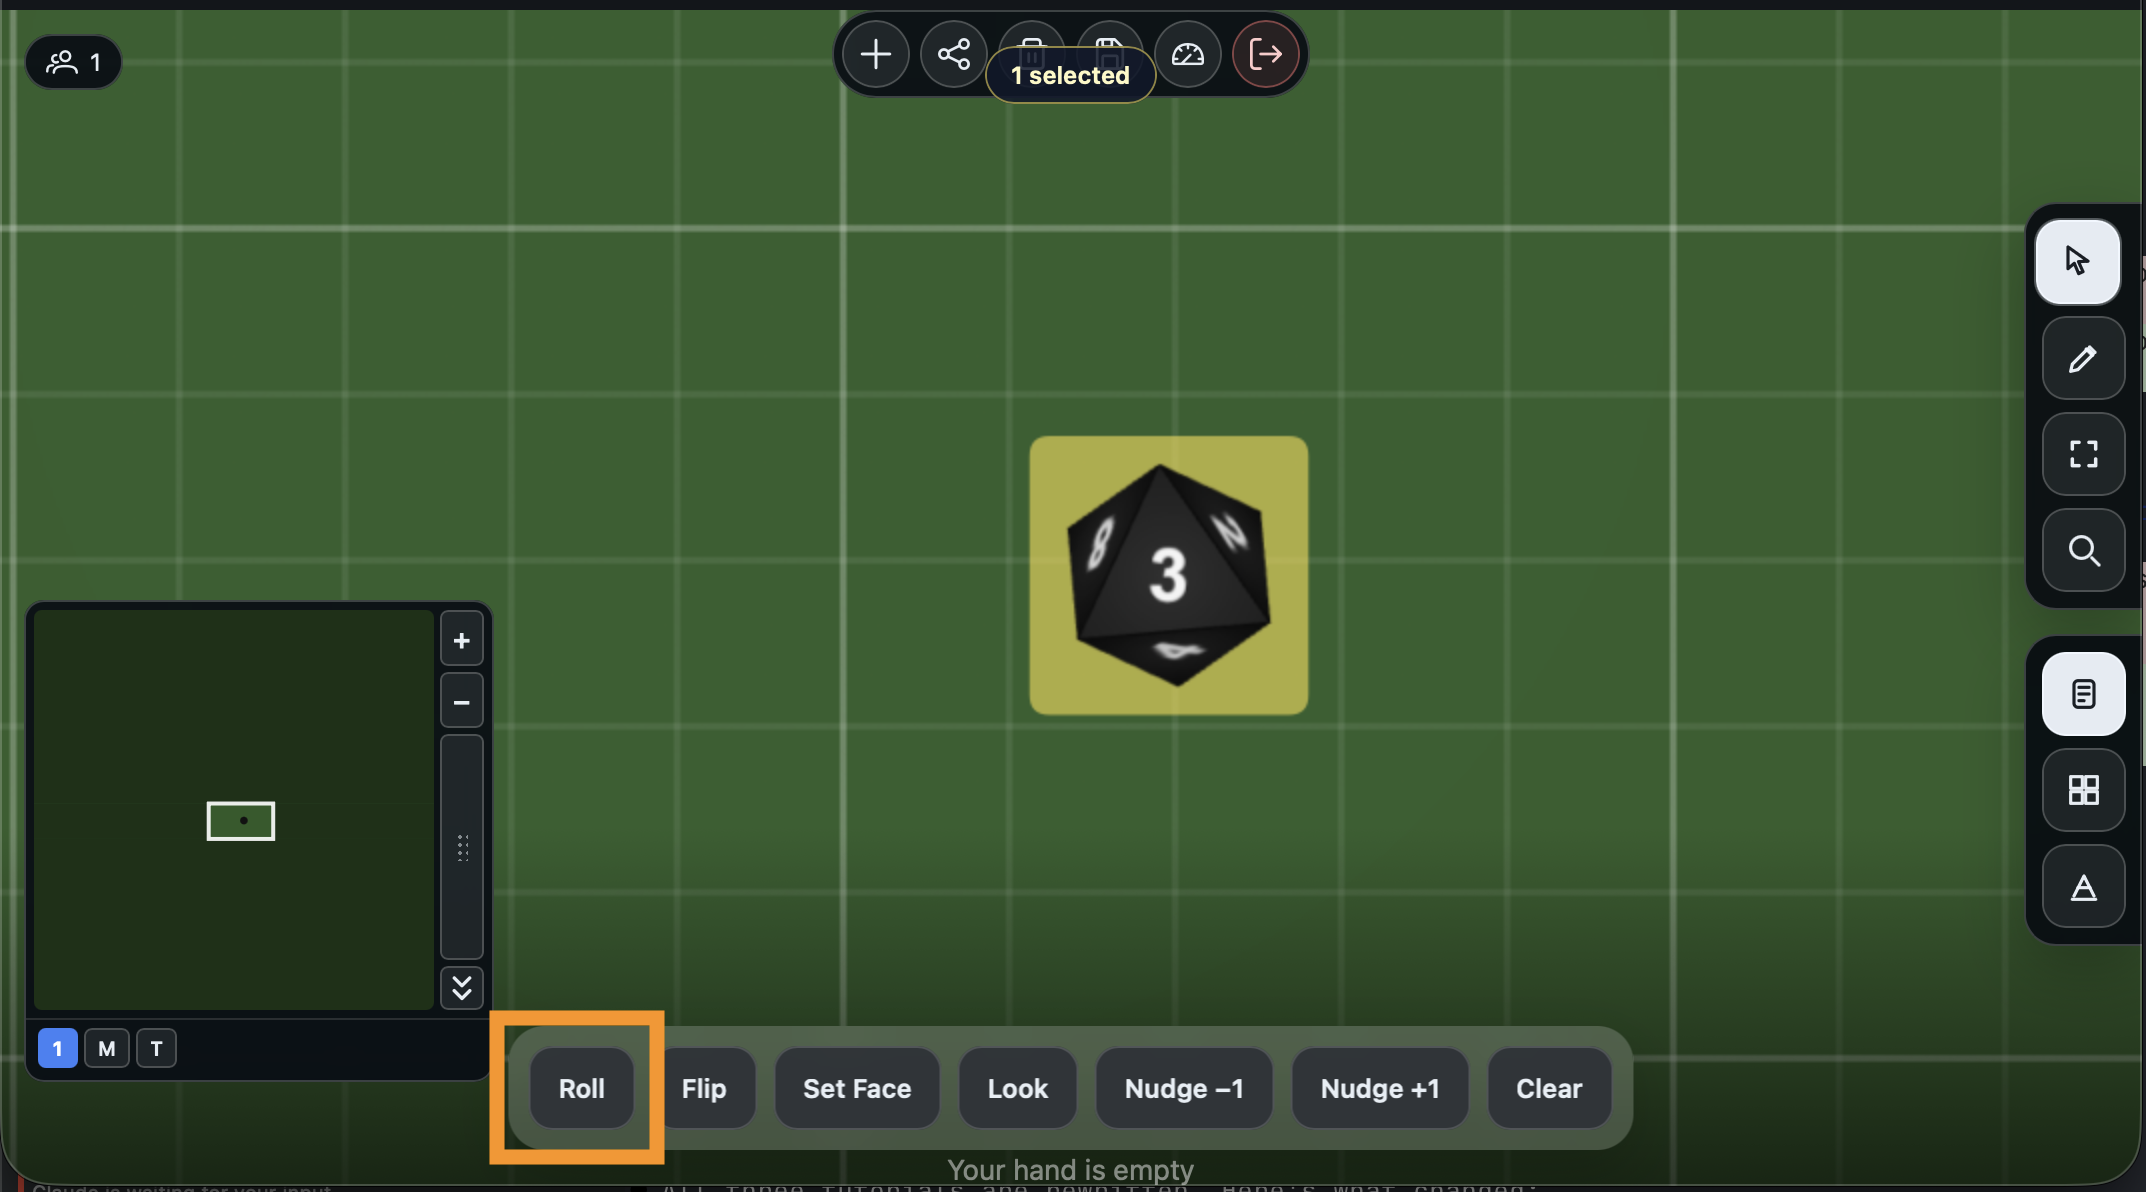
Roll it
Make sure the Interact tool is selected in the right-side toolbar (the cursor icon at the top). Click the die on the table. The Actions Dock appears at the bottom of the screen with buttons for everything you can do with this die.
Click Roll. The die animates a 3D roll and lands on a random face. Try it a few times.
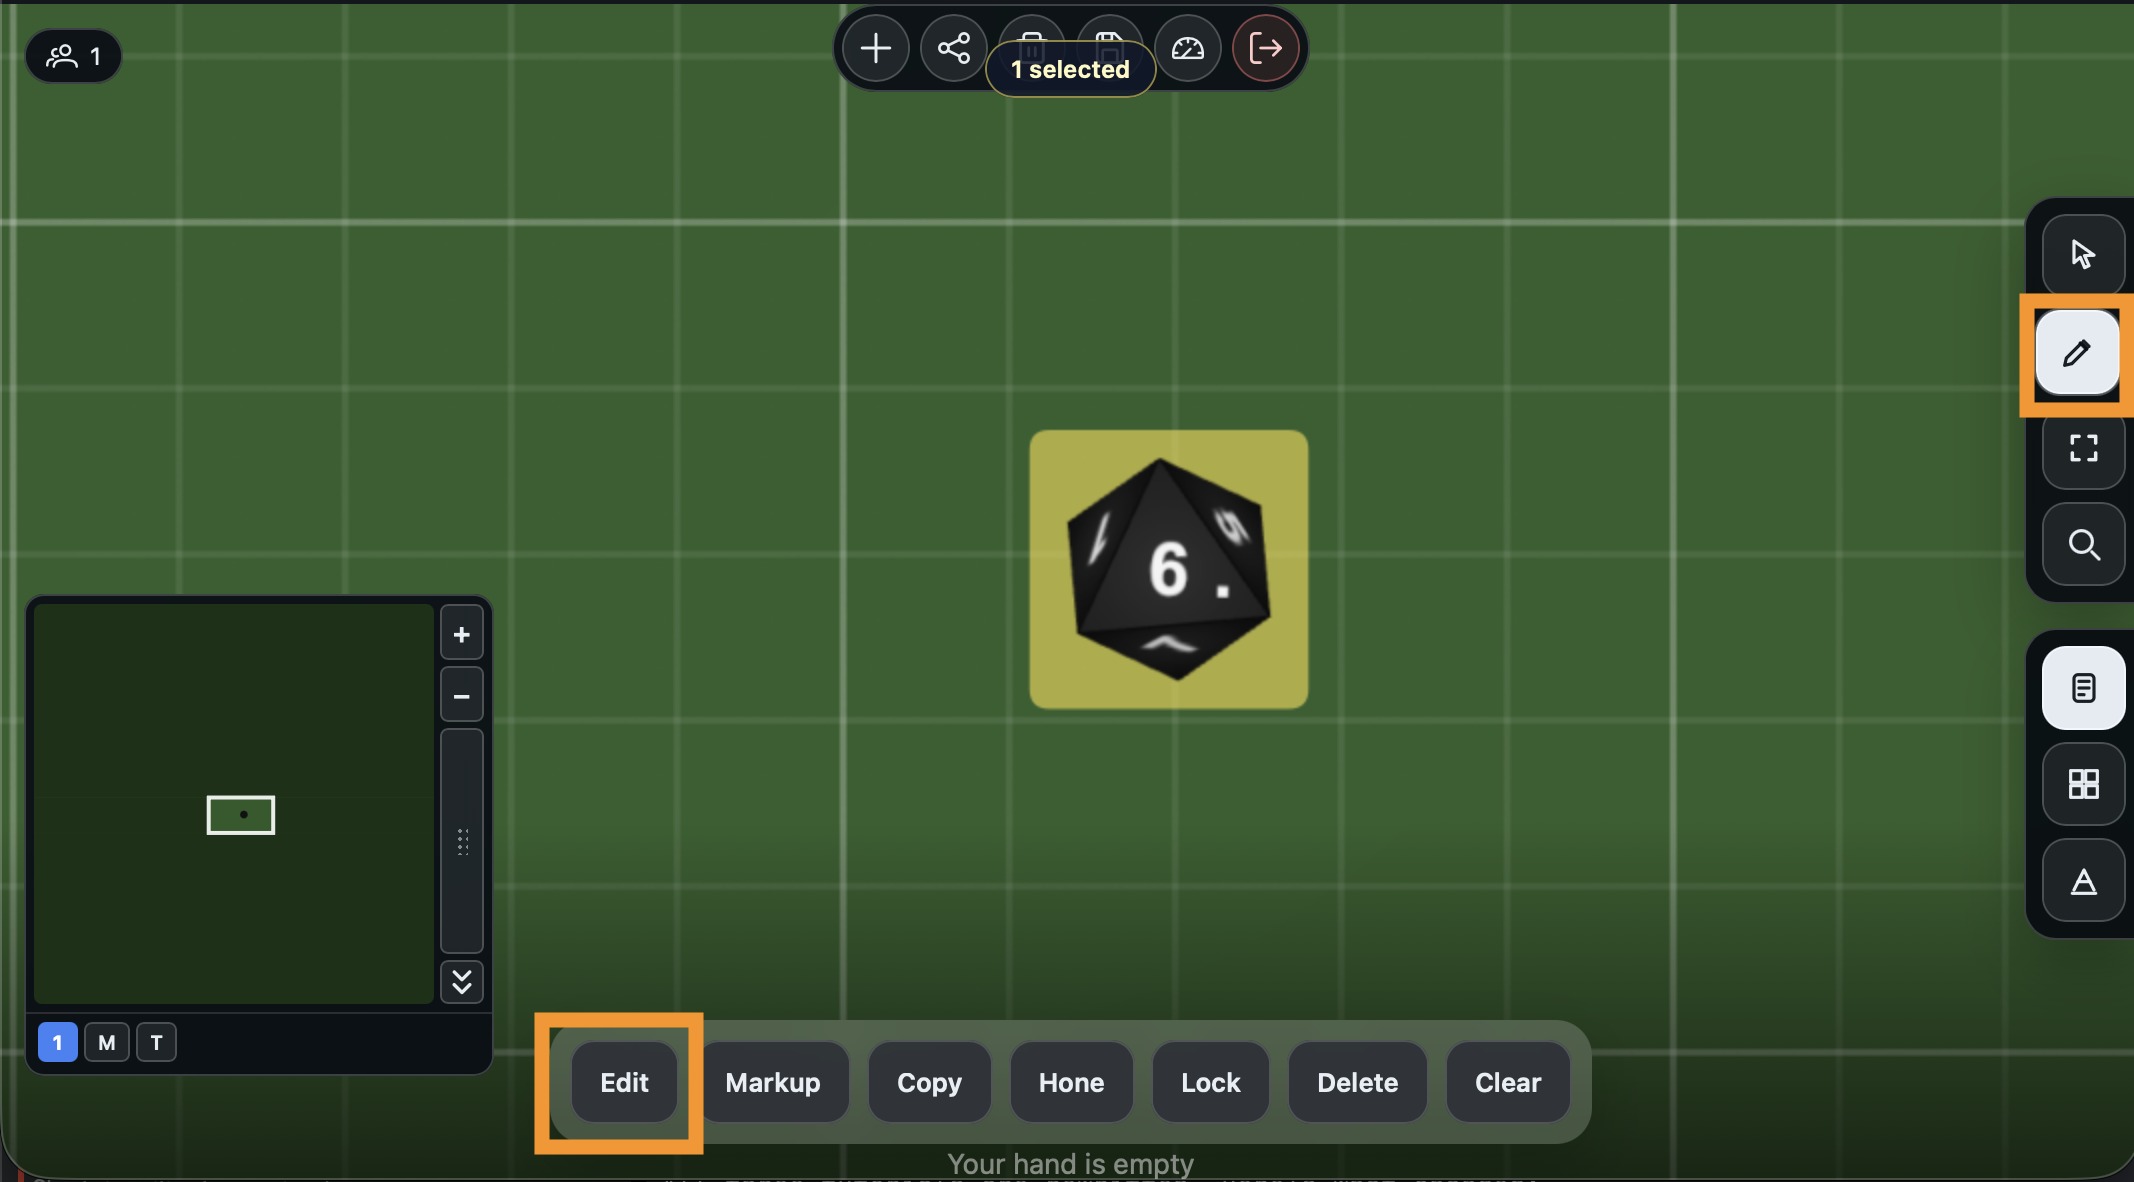
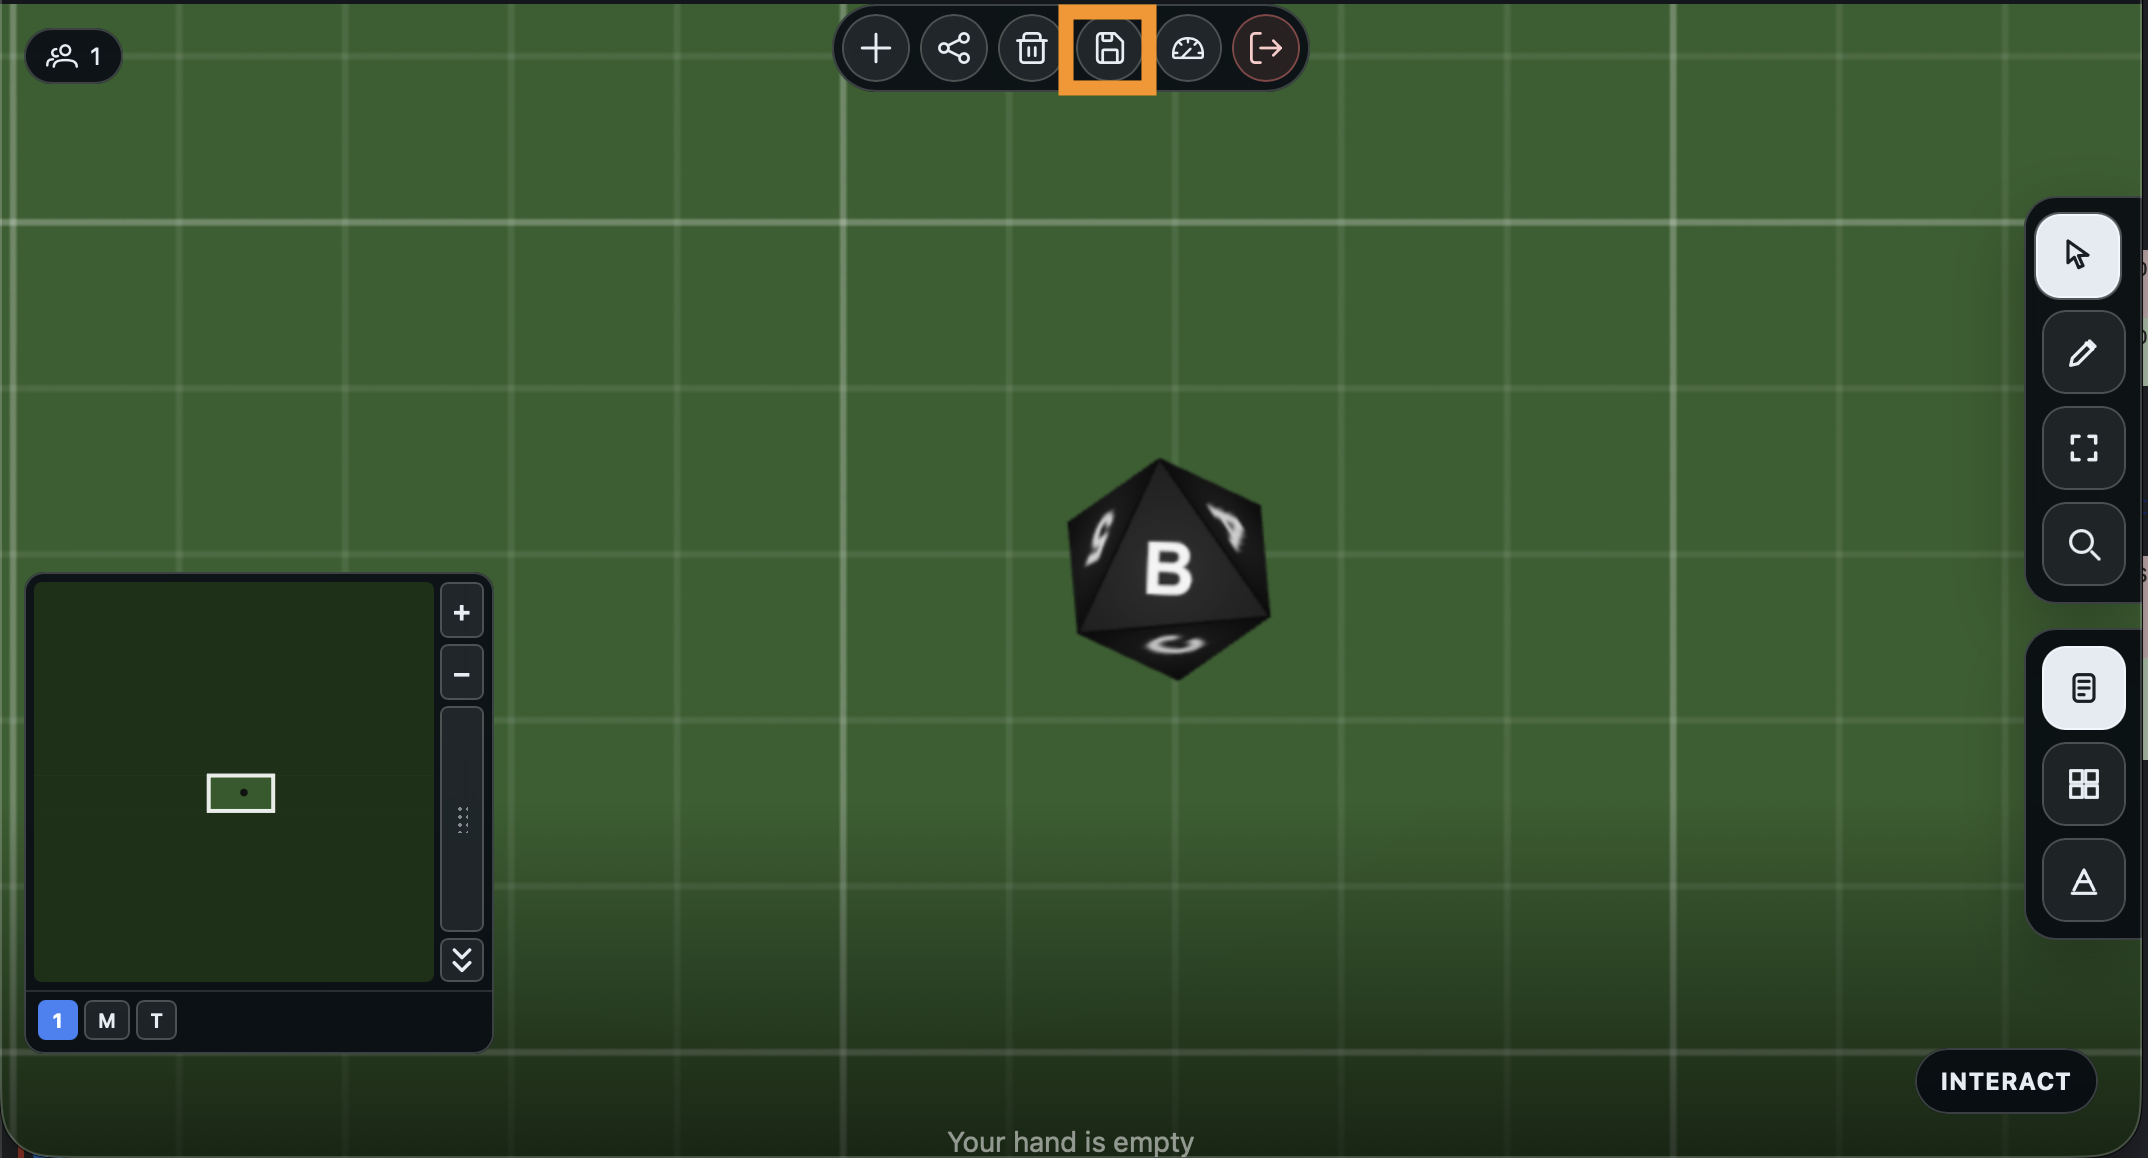
Customize face labels
Switch to the Edit tool in the right-side toolbar (the pencil icon). Click the die, then click Edit in the Actions Dock.
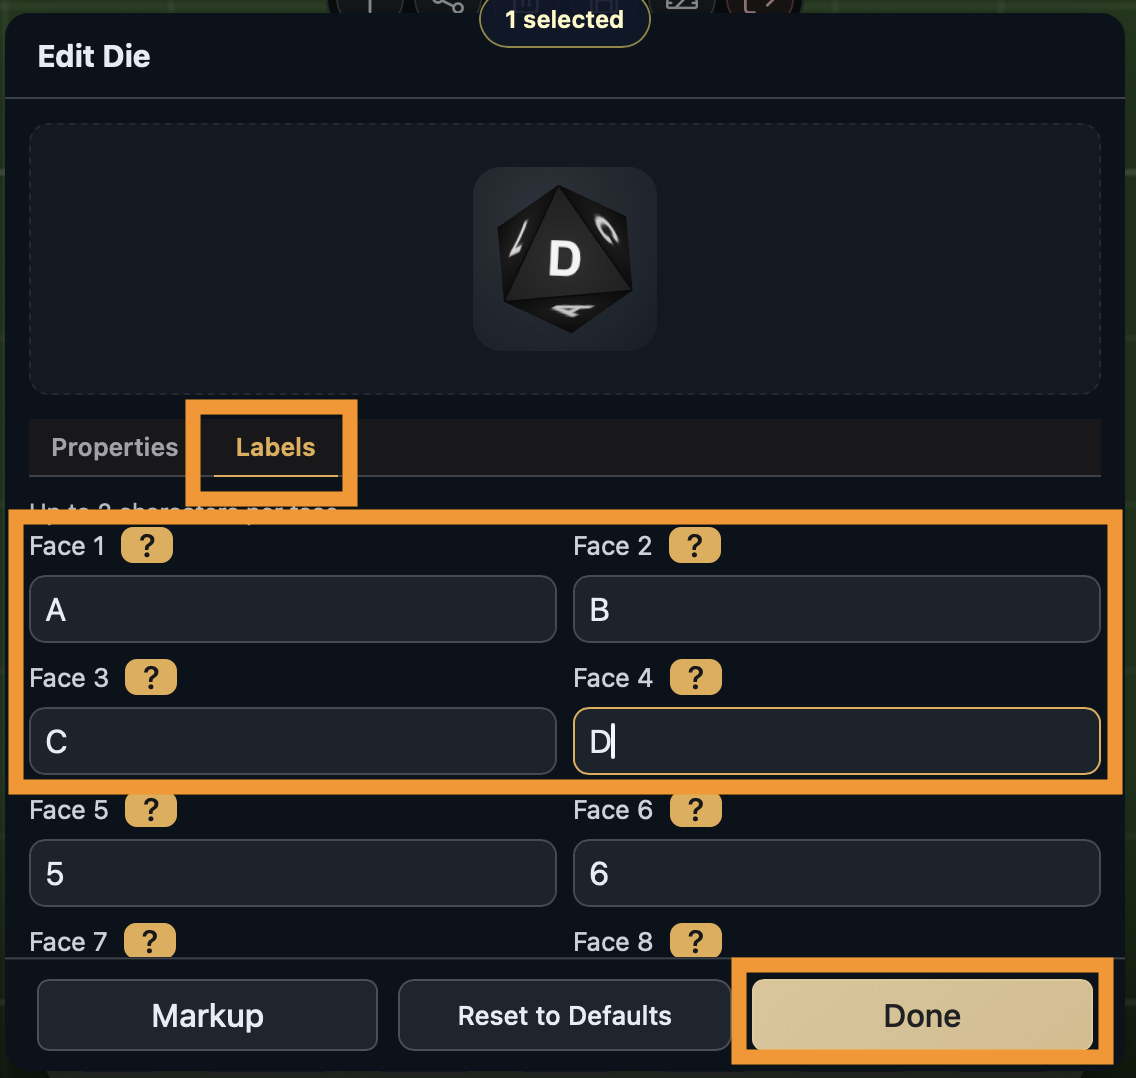
The die settings panel opens. Switch to the Labels tab. Each face has a text field where you can type a custom label. Change them to anything you want - letters, words, or symbols. Click Done when you are finished.
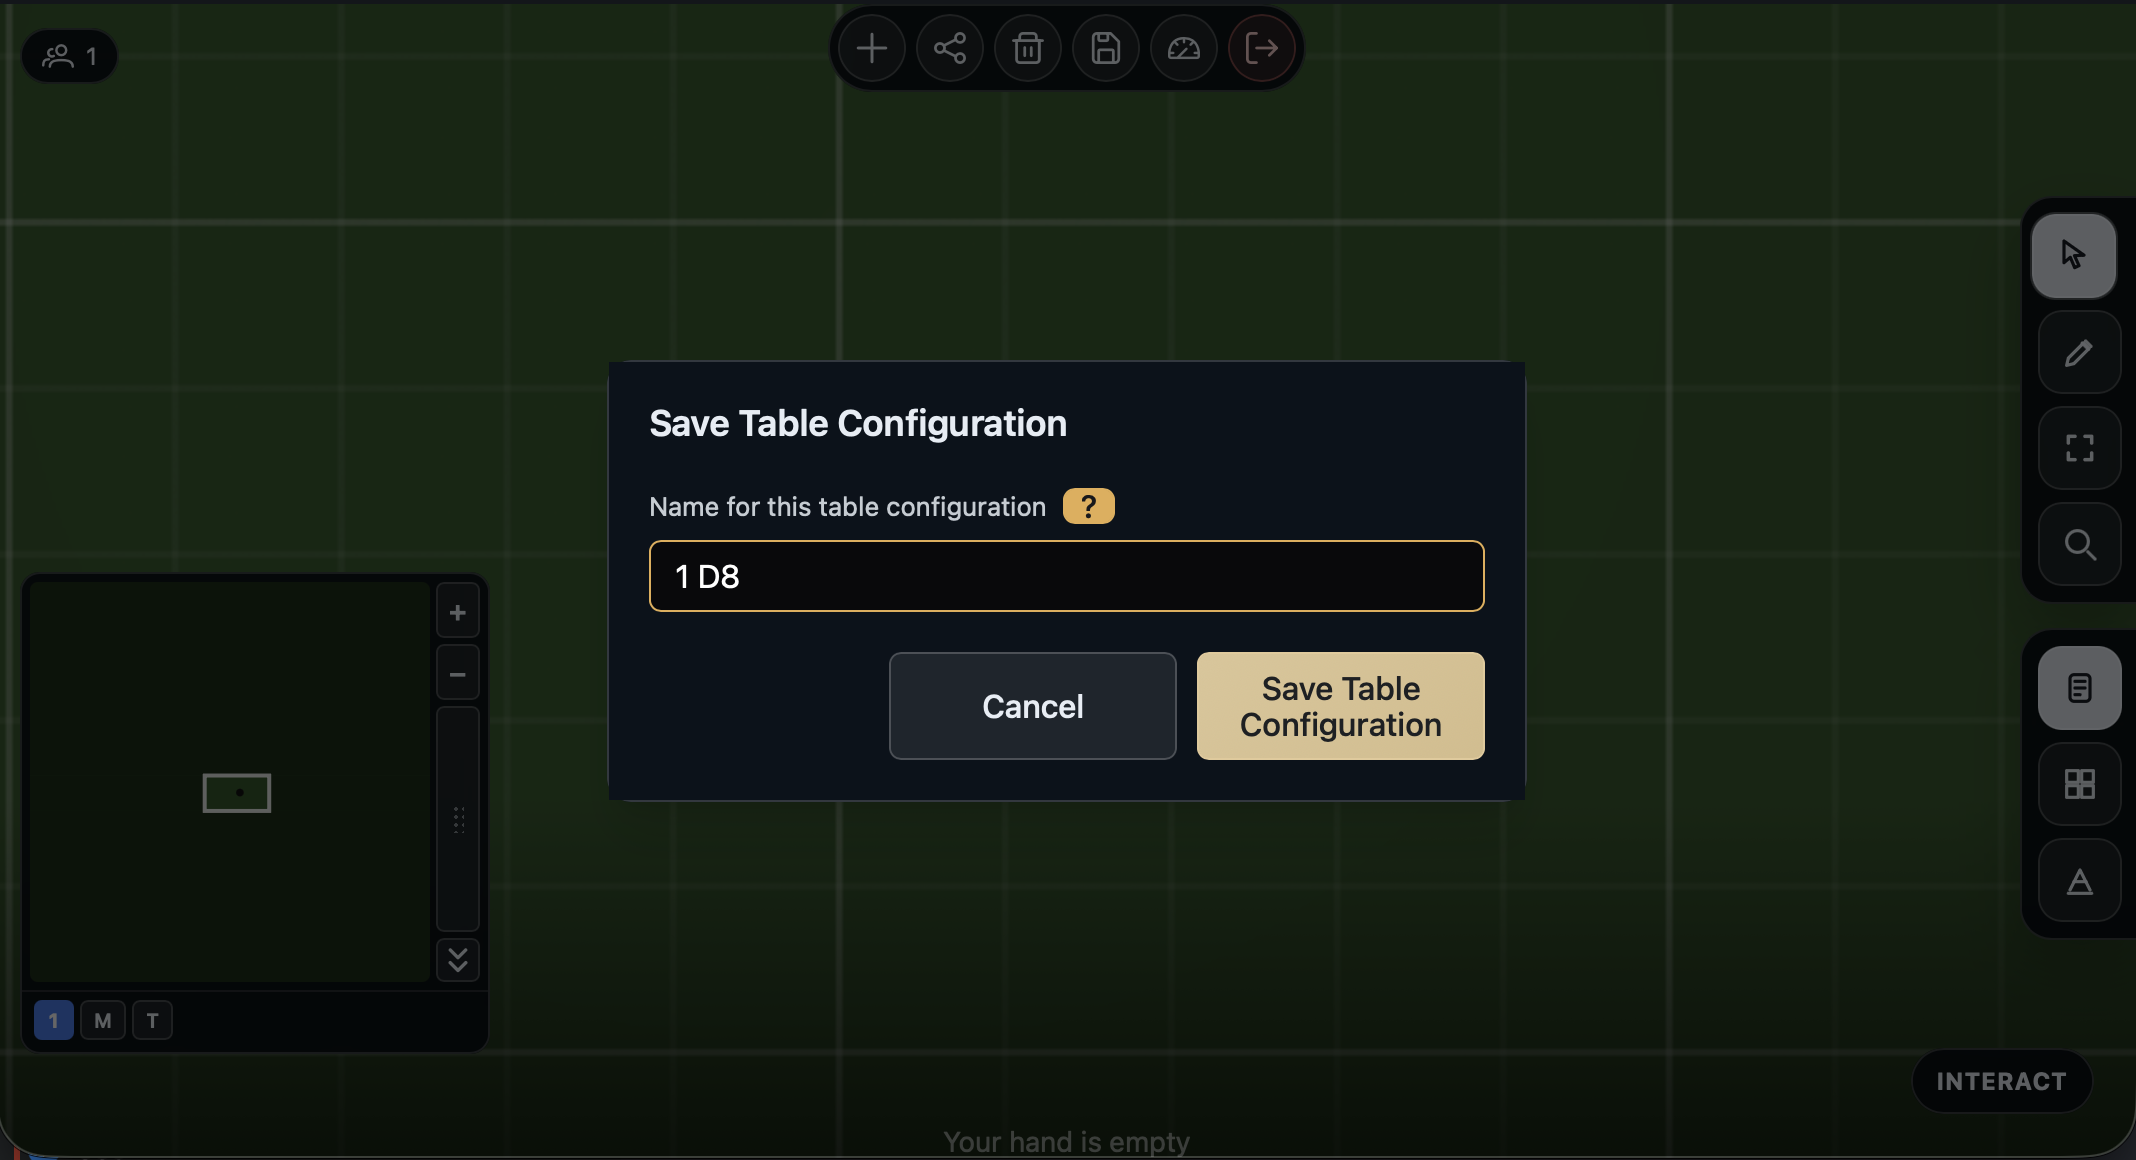
Save your table configuration
When you are happy with how the table looks, save it so you can come back to this setup later. Click the save button in the top toolbar.
Give your configuration a name and click Save Table Configuration. This saves a snapshot of the current table state that you can reload anytime.
What you built
You created a game, joined a table, added a die, rolled it, customized its labels, and saved the table configuration - all without uploading a single file.
Next: Build a Deck of Cards