Create a new game
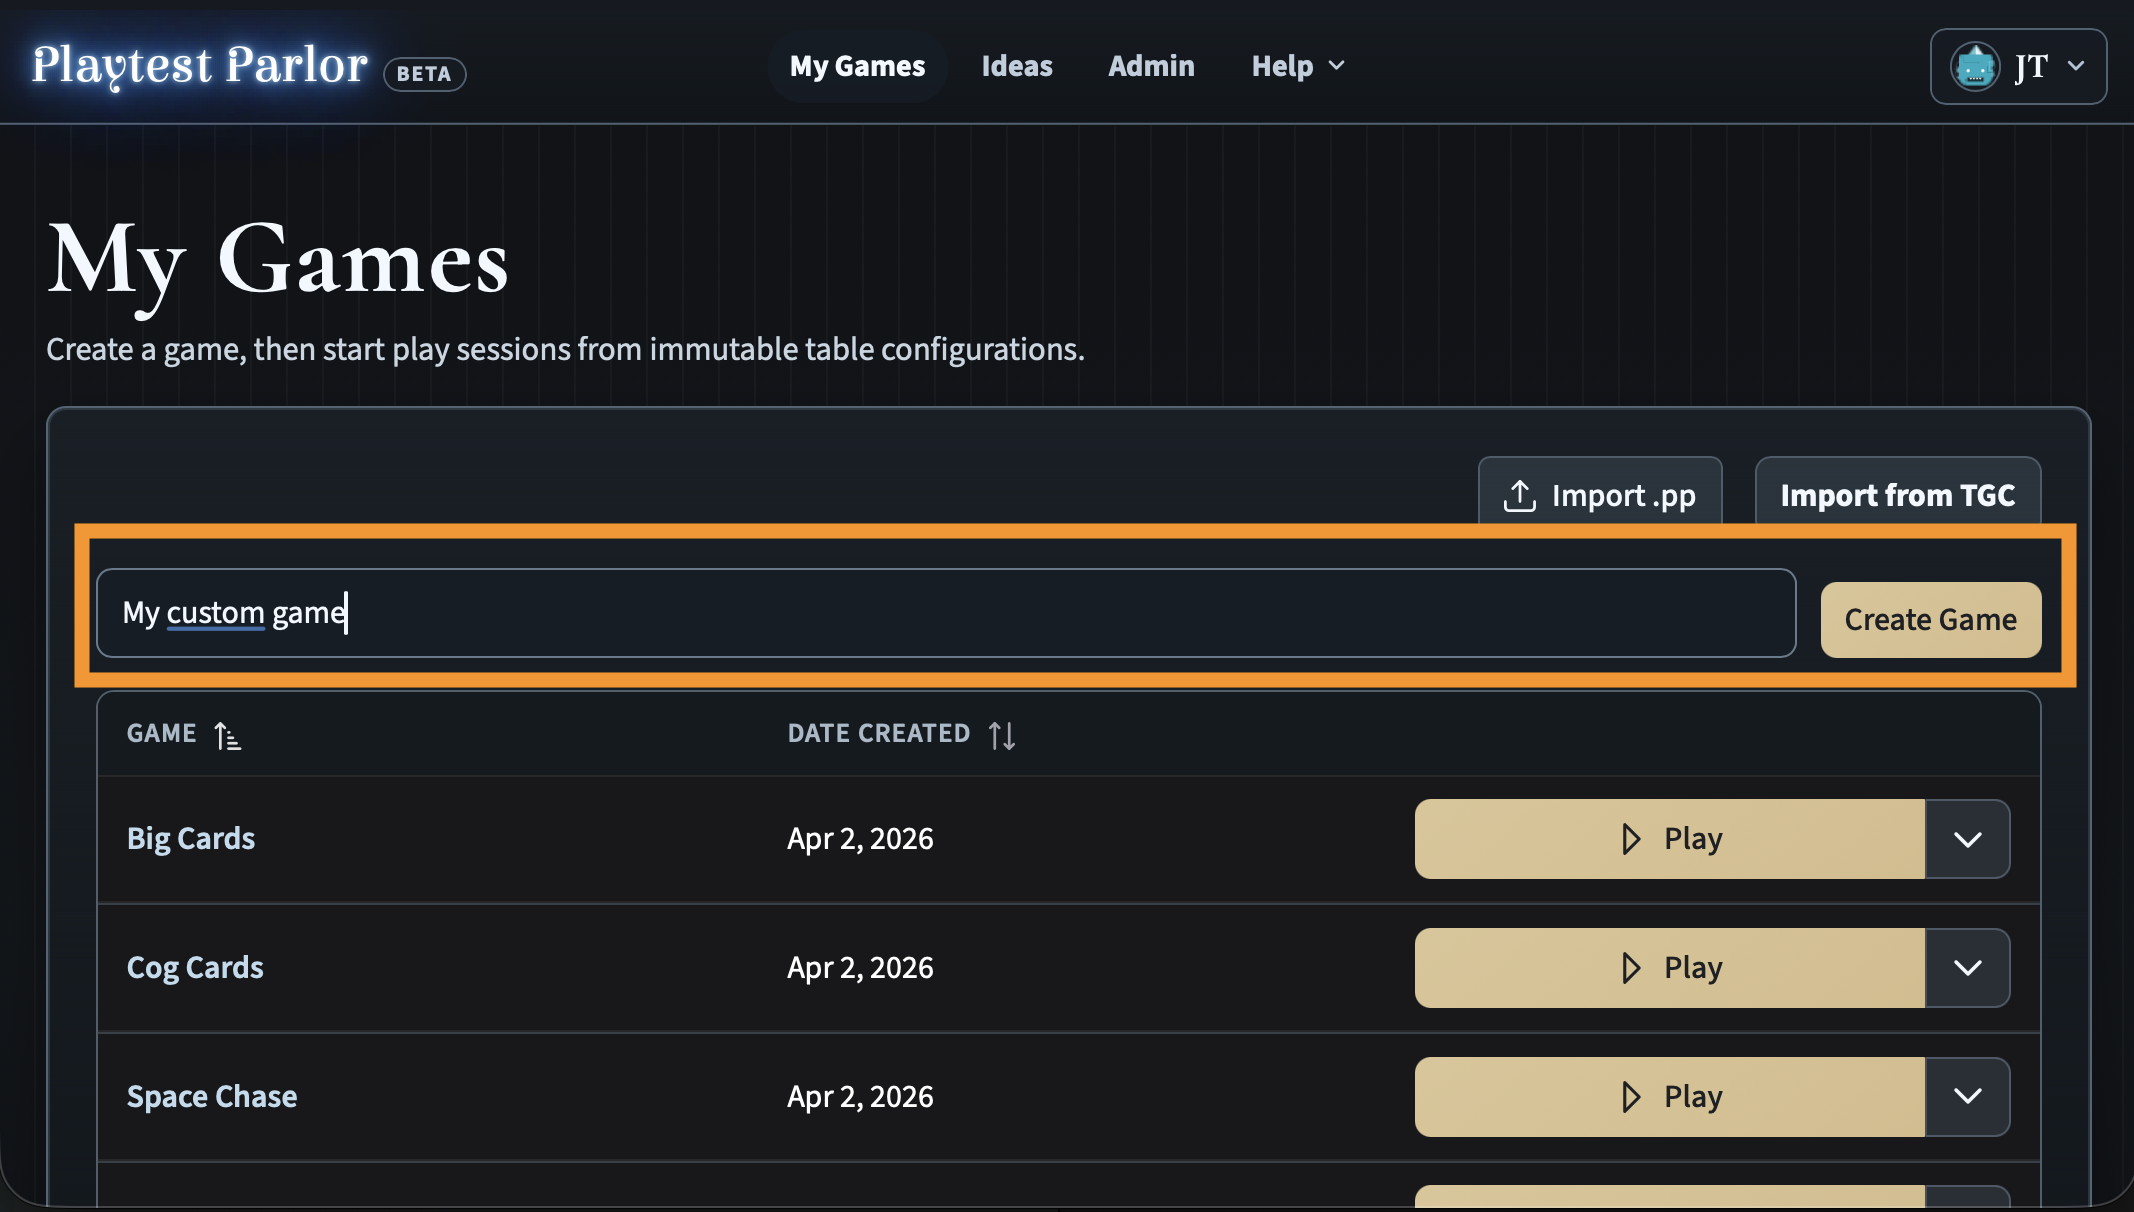
From the My Games page, type a name for your game and click Create Game.
Open the Manual Upload page
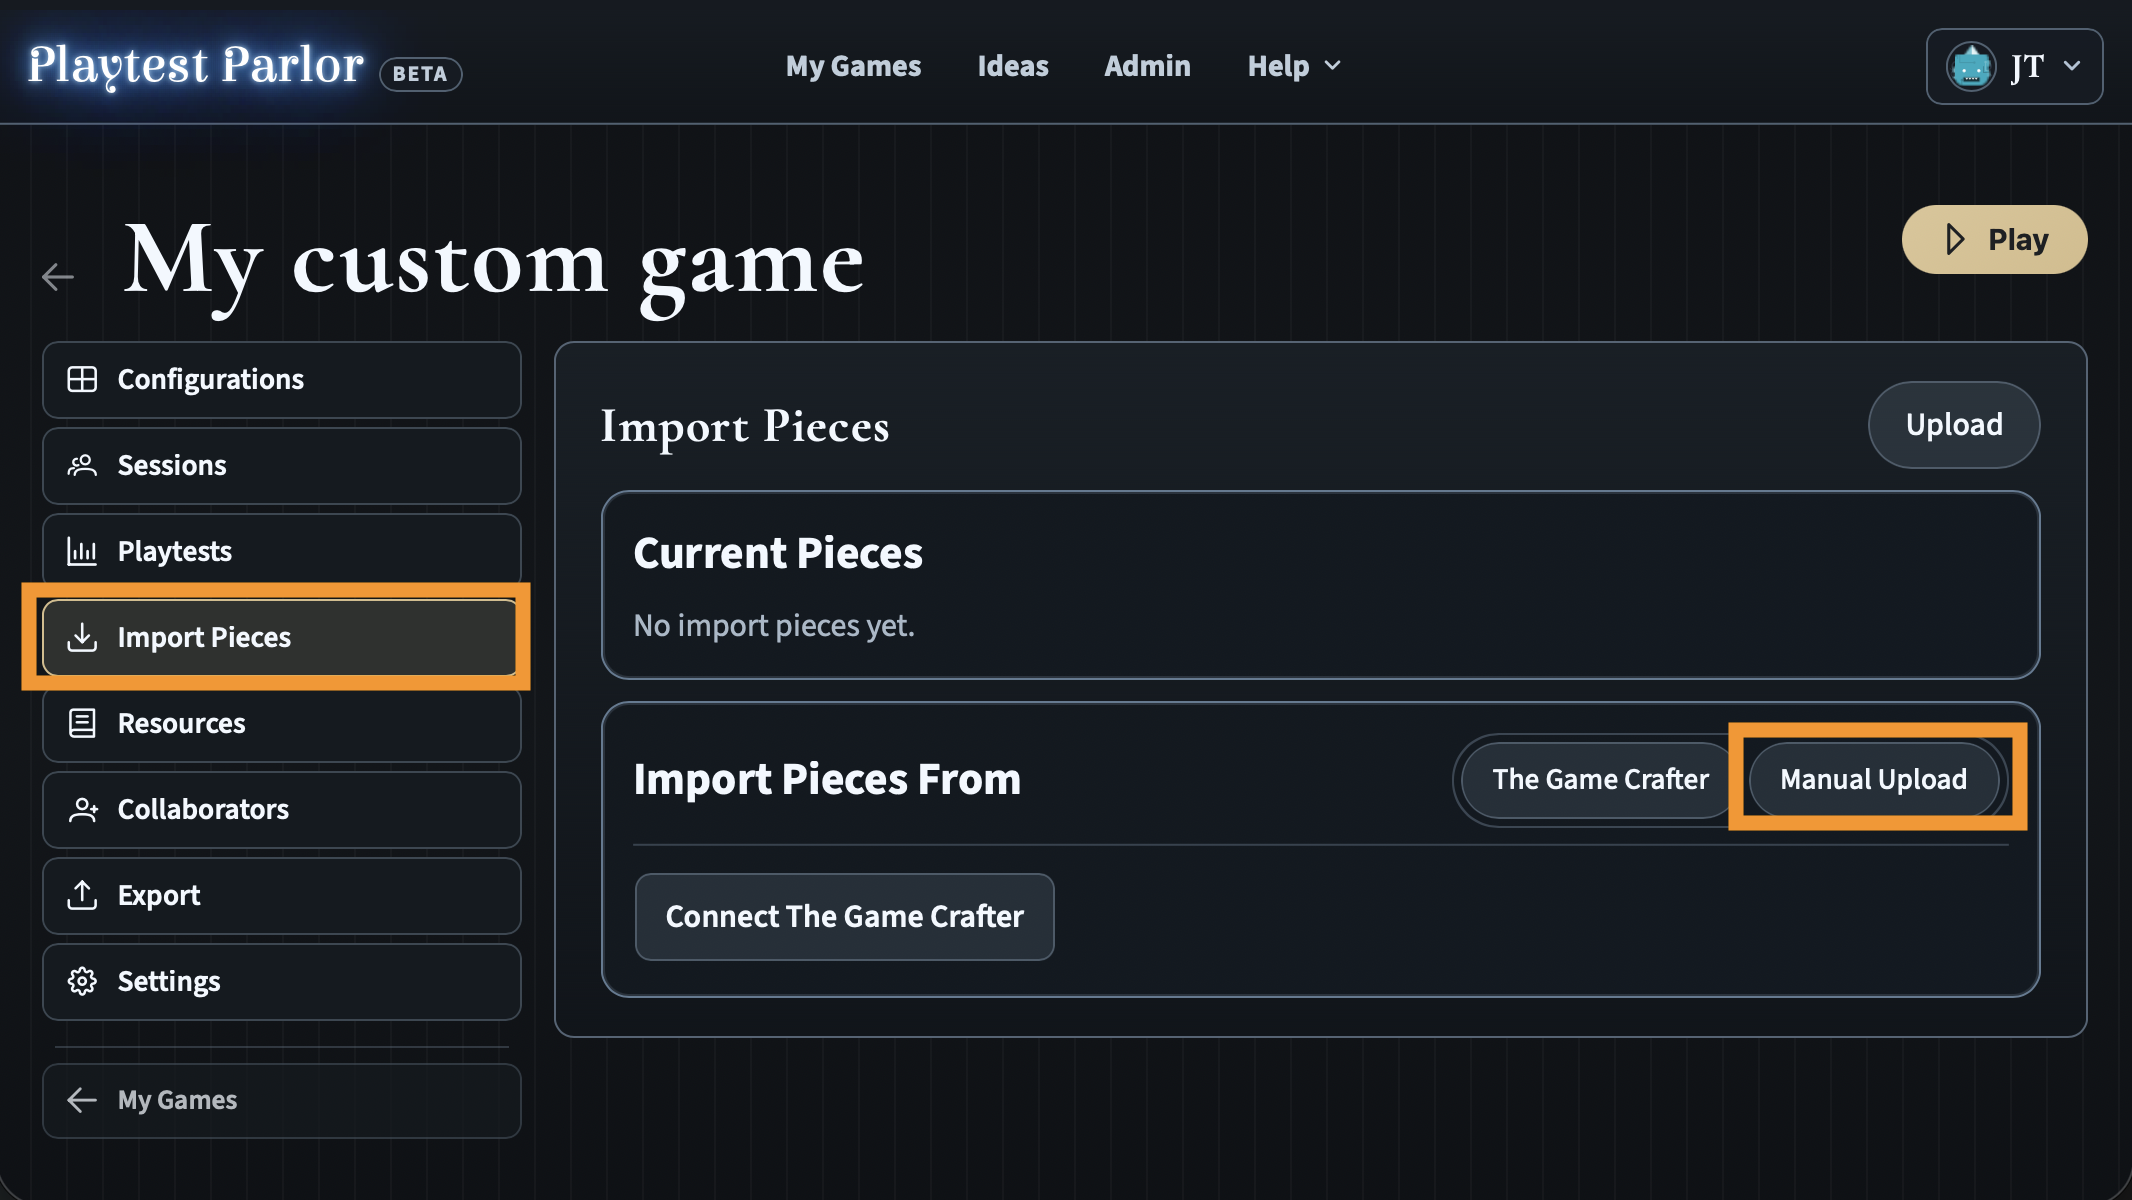
Navigate to your game and click Import Pieces in the sidebar. Then click Manual Upload to open the upload panel where you can turn your own artwork into playable pieces.
Upload tile faces
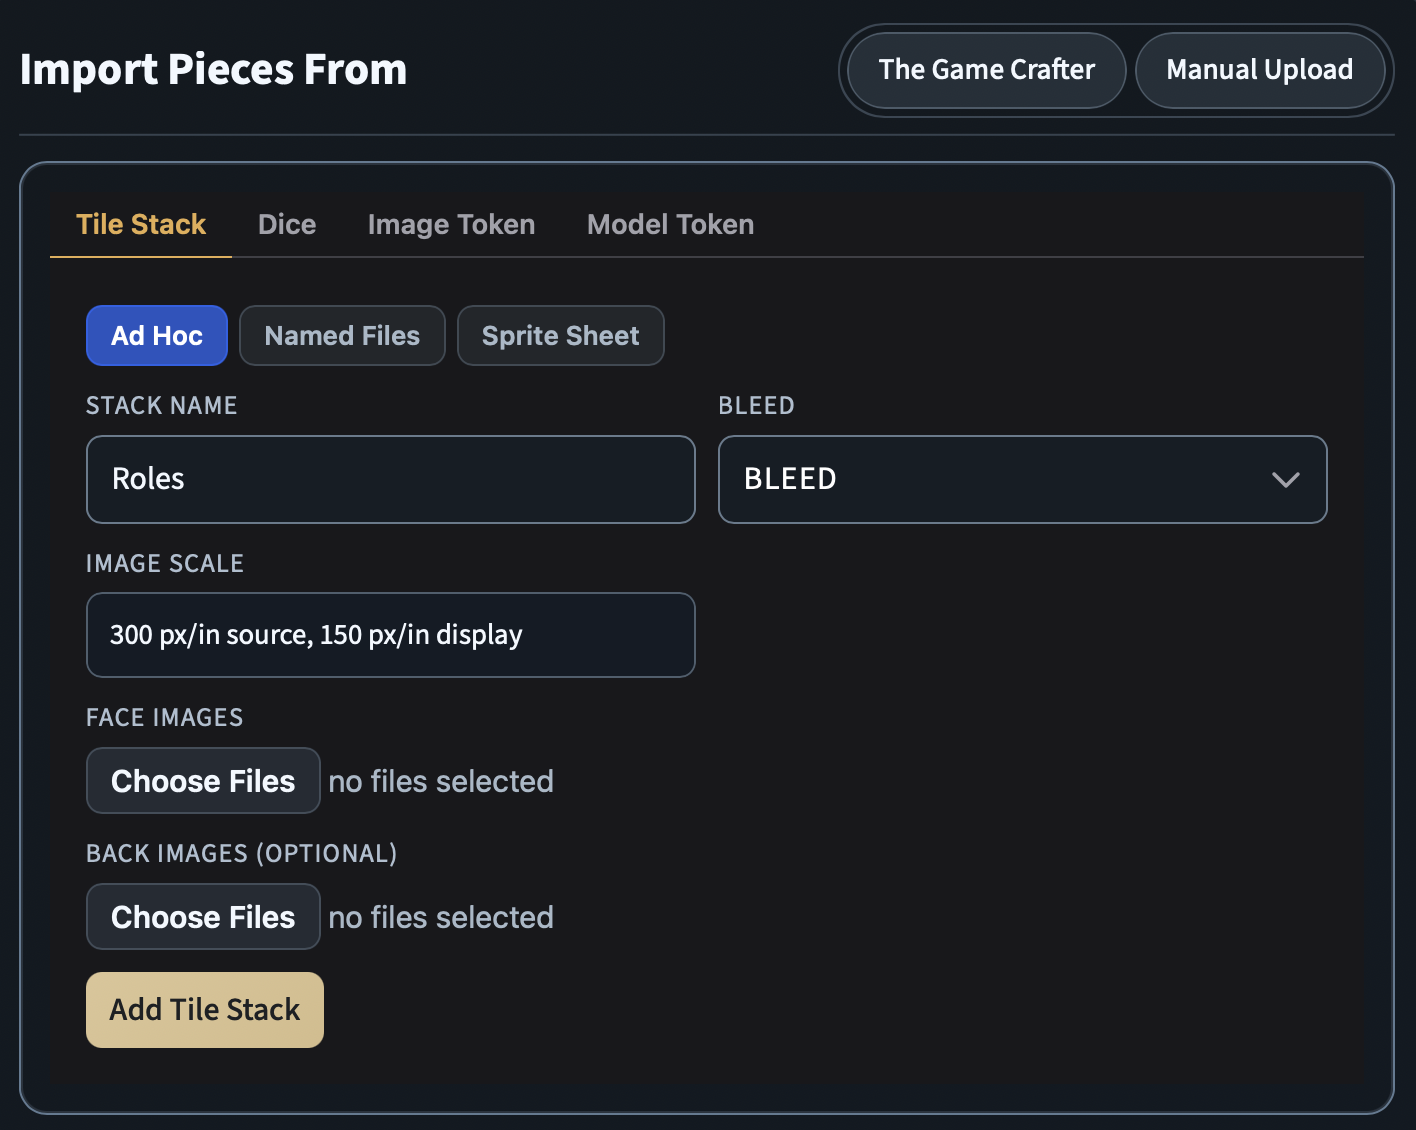
The upload panel has tabs for different piece types. Stay on the Tile Stack tab and make sure Ad Hoc mode is selected. Give your stack a name, then click Choose Files under Face Images to select images from your computer. Each image becomes the face of one tile. You can select multiple files at once.
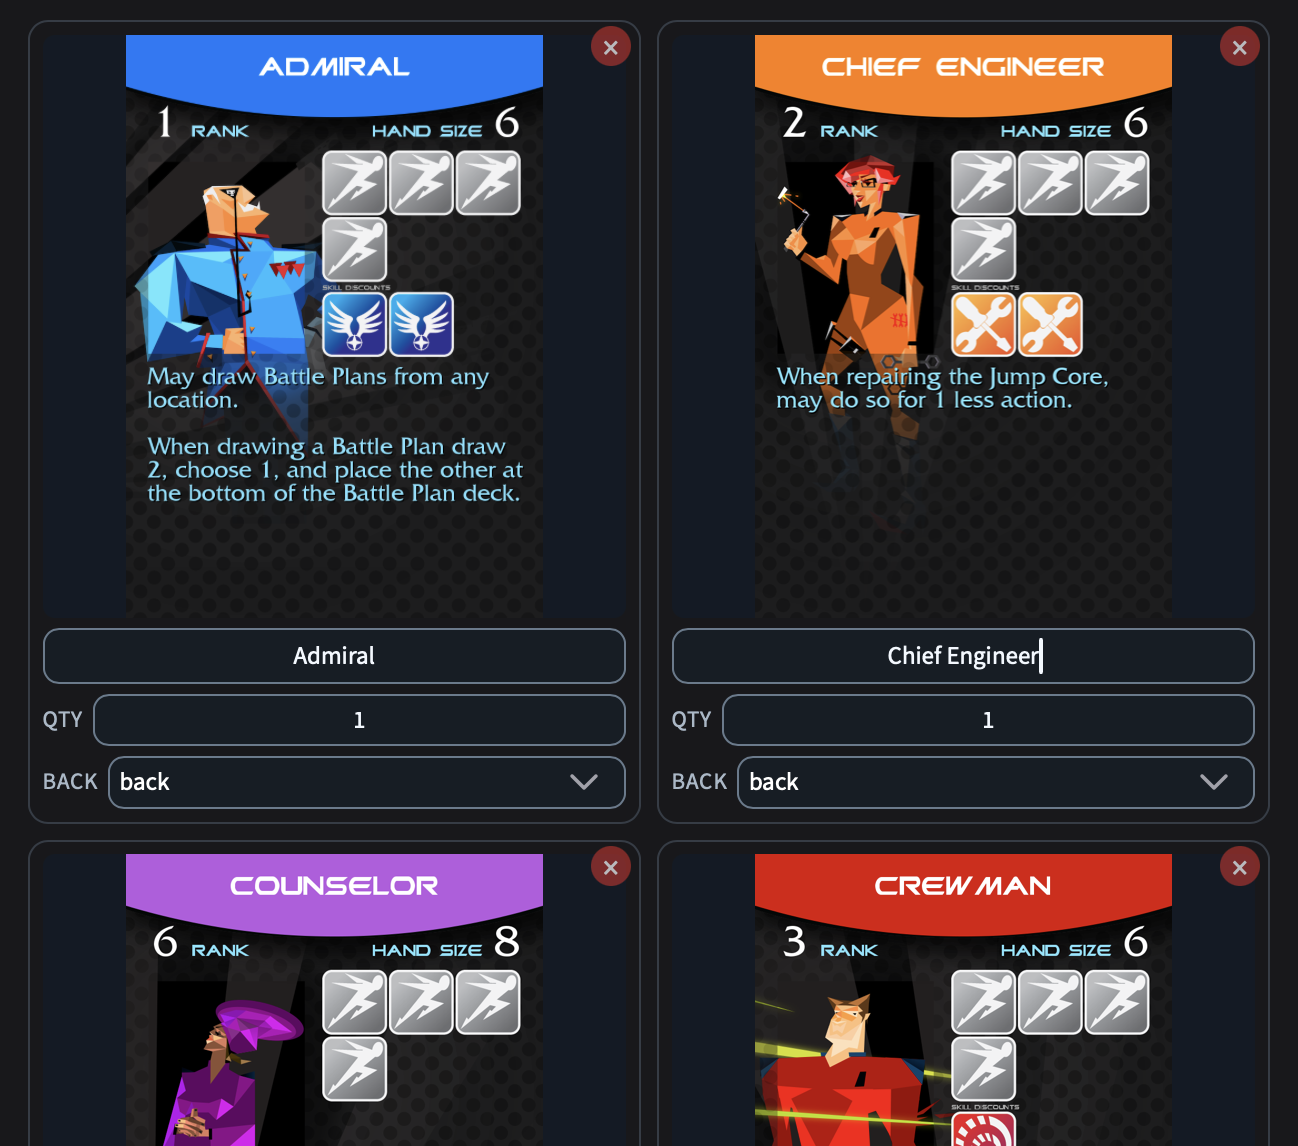
After selecting files, you will see a preview of each tile with its image. You can set a name and quantity for each one. If you also uploaded back images, use the Back dropdown on each tile to choose which back goes with which face.
Understand bleed mode
If your images come from print-ready files, they likely include a bleed area - extra pixels around the edges that get trimmed during printing. Playtest Parlor trims this bleed automatically by default.
If your images are already cropped to the final size with no extra bleed, switch to No Bleed mode before uploading. This keeps the full image without trimming.
Most of the time, if you are uploading screenshots, mockups, or images you made for screen use, you want No Bleed.
Submit the upload
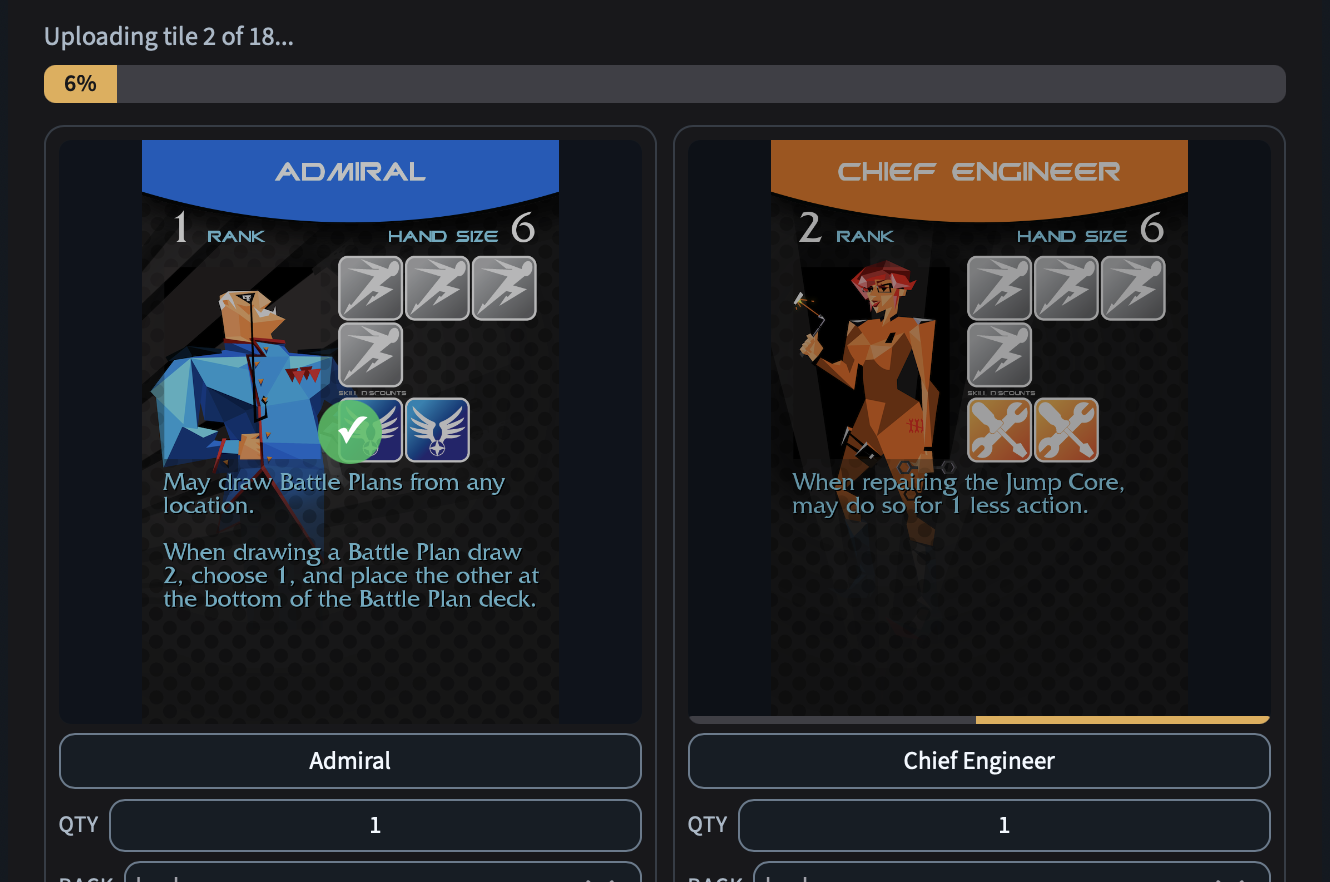
Click Add Tile Stack. Each image is uploaded, processed, and stored. You will see progress indicators and checkmarks as each file completes.
Add your custom deck to the table
Once the upload finishes, start a New Play Session from your game page to open a table.
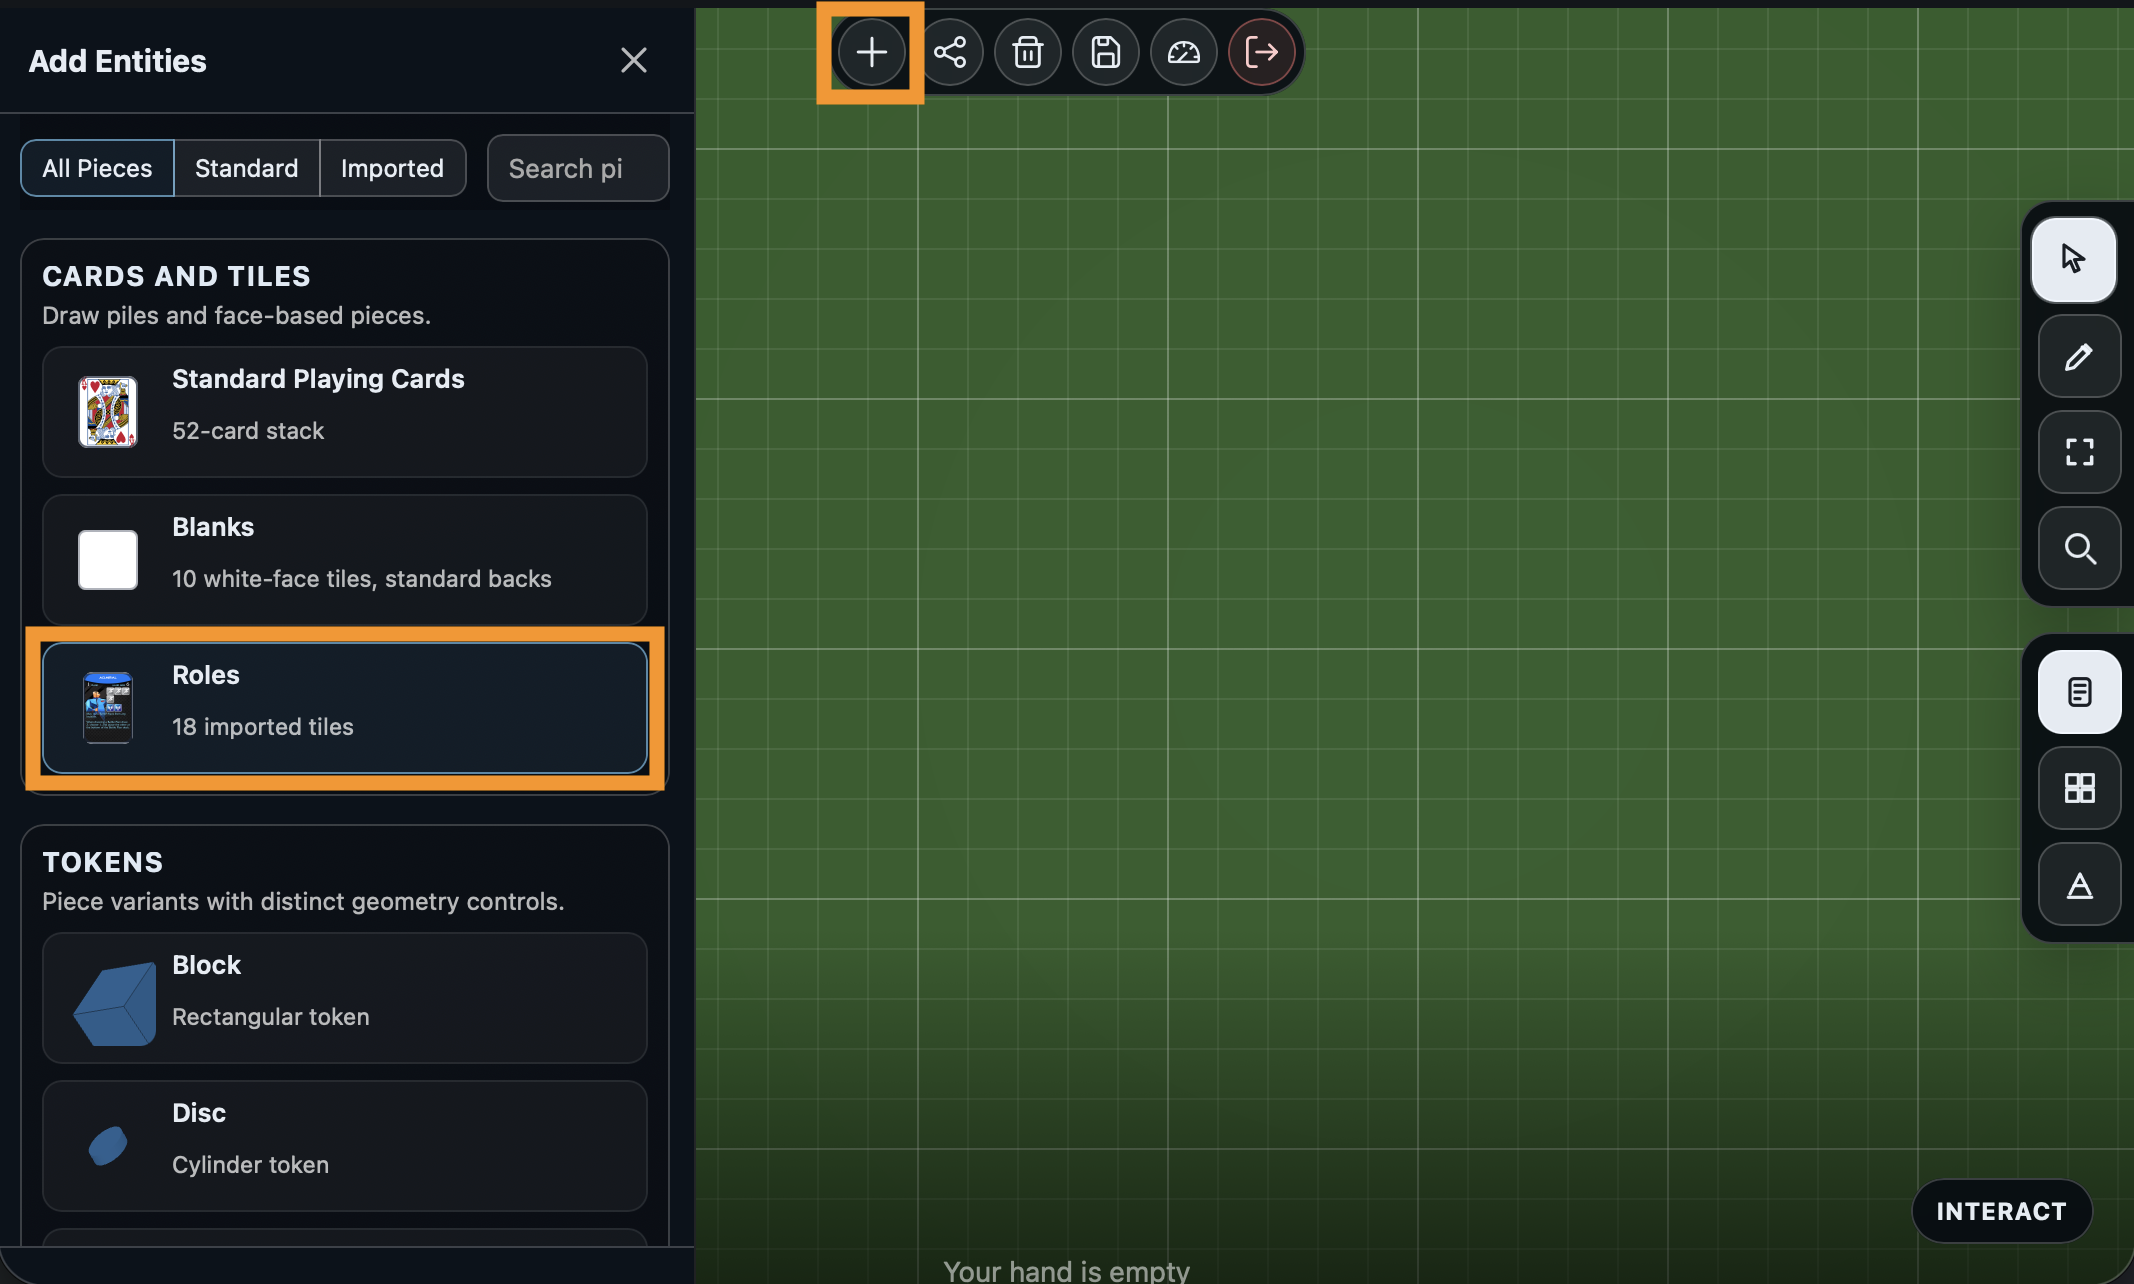
Click the + button in the toolbar. Your uploaded tiles now appear in the piece browser under Cards and Tiles. Click your imported stack to add it to the table.
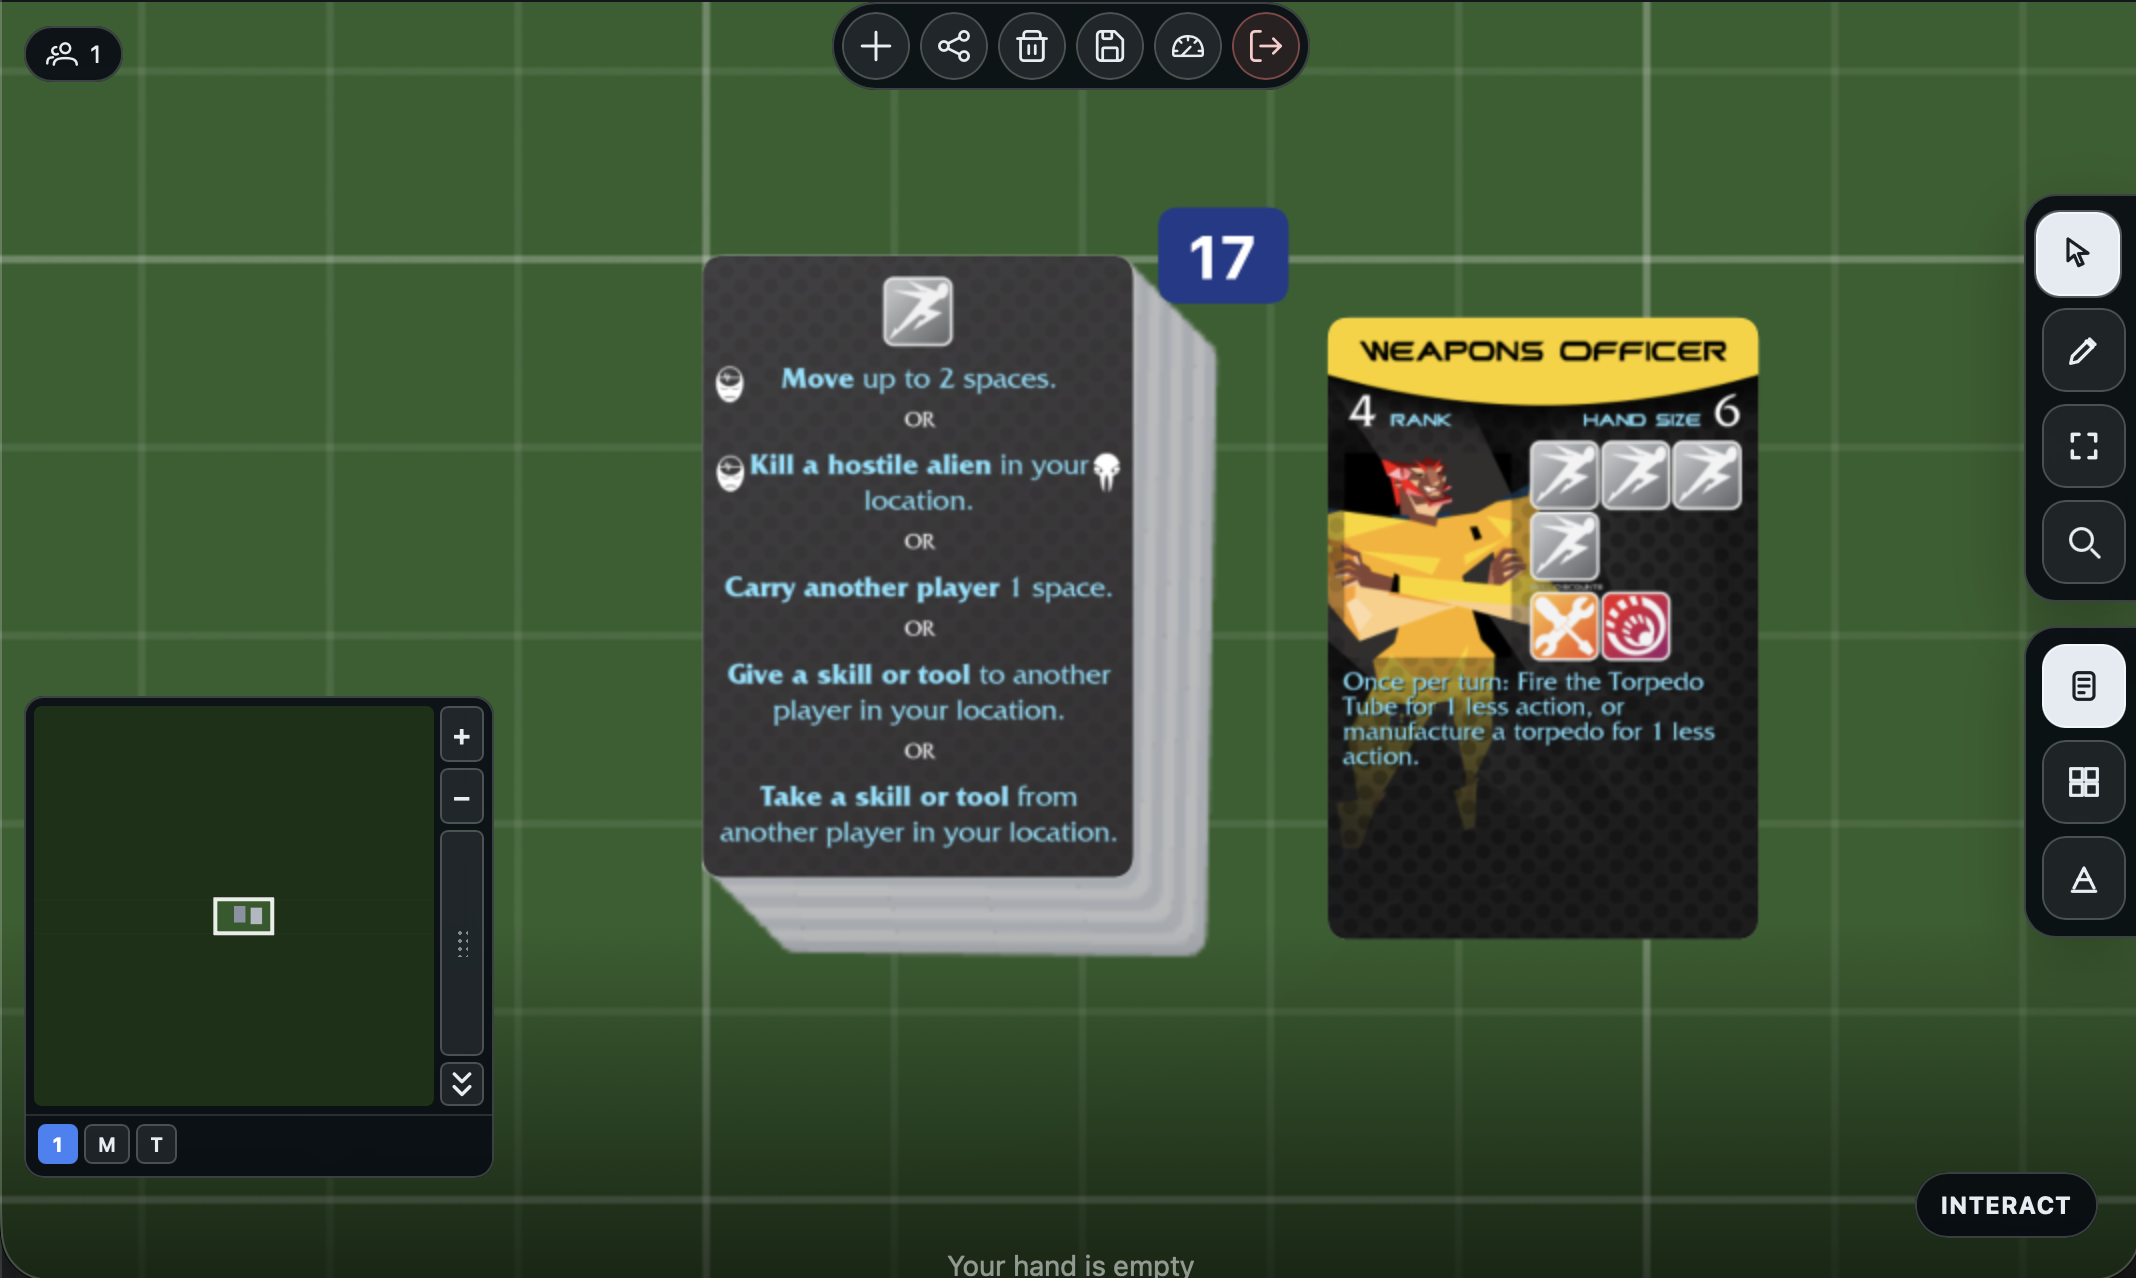
Your artwork is now live on the table as a playable deck. You can flip, draw, shuffle, deal, and interact with it the same way you did with the standard cards in Tutorial 2.
What you built
You uploaded your own artwork and turned it into a custom deck on a playable table. Combined with what you learned in the first two tutorials, you now have everything you need to prototype a board game from scratch.
What's next
- Explore the Entities reference to see every piece, space, and annotation type available.
- Read about Spaces to learn how to create boards with grids and placement areas.
- Check out Annotations for labels, arrows, and other visual guides you can place on the table.